Creaking chipboard flooring is usually the result of one of the following issues:
- The boards are rubbing against each other
- Fixings are rubbing against the chipboard.
More often than not, this is due to poor installation, and you can usually fix the issue quite easily, with some well-placed screws.
Chipboard flooring is quite common, especially in modern, new build properties. This is mainly because it is affordable and easy to install. Sheets generally come in 2400mm lengths at a width of 600mm. Therefore, one sheet is the equivalent of around 6 standard timber floorboards.

This means less measuring and cutting. As well as less fixings required in a full board. The result is a much quicker installation.
In order to install woodchip flooring correctly, a wood glue should be applied to the joist and the tongue and groove joint on the floorboards. Following this, the chipboard should be screwed down to the joists. if this is done correctly, then chipboard flooring is far less likely to move and creak.
The screws will give a very solid tight fixing, that prevents the chipboard from moving, and the glue will cause the tongue and groove to form a much stronger bond when it sets.
Why does chipboard flooring creak
As we mentioned previously, creaking is usually the result of wood rubbing on the fixings, or the boards rubbing against each other. The risk of either happening, is massively reduced by gluing and screwing.
The reason it does end up happening, is usually due to rushed, or low-quality installation. The most common reasons are a lack of glue added in the joints, and nailing the chipboard, as opposed to screwing.
This could be a specification applied by the housebuilder themselves to speed up the job and save money.
Also, if the people installing the floors are working on price work, they may be incentivised to install the flooring quicker. Price work (or piece work) means they are not on a daily or hourly rate. Instead they are paid on a fixed rate per unit. This could be something like £x per meter of flooring.
If you are being paid per meter, or some similar metric, then nailing the floorboards and neglecting the glue will save a huge amount of time, resulting in far more work completed. As a result, this will mean more money.
The fitters will often use ring shank nails and a nail gun to achieve a more solid fixing. However, this is still nowhere near as good as screwing them down. As the boards expand and contract due to temperature and humidity even a ring shank nail can potentially loose grip.
If they use standard smooth nails, this will be even worse and greatly increase the risk of creaking floors.
Fixing creaks in chipboard flooring
To fix creaking, you need to identify where it’s coming from. This is pretty simple. You can just walk on the floor to find the areas that are making noise.
Once you identify the area you would like to fix, you can pull back the flooring to access the chipboard below. For carpet this will just involve pulling the carpet away from the grippers and rolling it back.
If the floor has been nailed, this is almost definitely the reason its creaking. If you stand on the exposed board, you may even be able to see movement.
By fixing it down more securely with screws, you should completely eliminate any creaking.
However, before you start, you should consider whether there are any pipes or wires below the flooring.
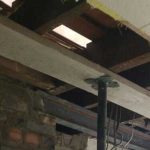
In modern properties, where chipboard is more common, electrics and plumbing usually run through the centre of the joists. Therefore, in a property with 195mm joists, pipes should be at least 90mm below the top of your floorboards.
Older properties will often have pipes notched into the top of joists. Obviously, this has a greater risk when randomly screwing through your floor, which means, you may need to investigate further.
Another thing to consider, is where water needs to run to. Look for radiators, bathrooms etc. Try to figure out how likely a pipe is to be running where you are screwing.
Finally, to be on the safe side, you should know where your stop tap is, just in case.
It would be very unlucky to screw through a pipe, but it does happen.
Once you are confident its safe, you can apply screws to the chipboard flooring. In most cases this will resolve the issue and completely stop any movement and creaking from the chipboard.
Adding glue to joints
Another potential is no glue in the tongue and groove joints. We certainly don’t want to lift the entire chipboard floor, just to glue joints. However, it is a good idea to try and get some glue in there, to reduce movement between the boards.
One easy way to do this, is by diluting a standard wood glue with water and brushing it into the joints. To do this, you want it quite wet, as this will allow the glue to seep into the joint. The extra moisture may also cause the tongue and groove to expand, which will further tighten the bond between the chipboard sheets.
The glue will take a little longer to go off, due to the extra water. However, once it sets, it should produce a decent amount of grip inside the tongue and groove.
Conclusion
Creaks in chipboard flooring are quite common. However, it is a relatively easy fix.
Usually issues have been caused due to poor fitting. and most are easy to fix with the boards in place. All you really need to get rid of most noises in the floor is some screws and a standard wood glue.
Just remember to always check for pipes before you start screwing.