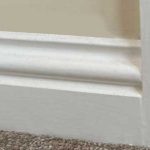
Architrave is a decorative feature, which is used to cover the gap between door frames and the surrounding wall. This gives a neat and aesthetically pleasing finish.
Architraves are nailed in place and will often have a grab adhesive on the back, as well as wood glue on the mitred corners.
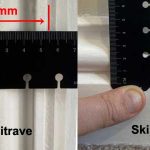
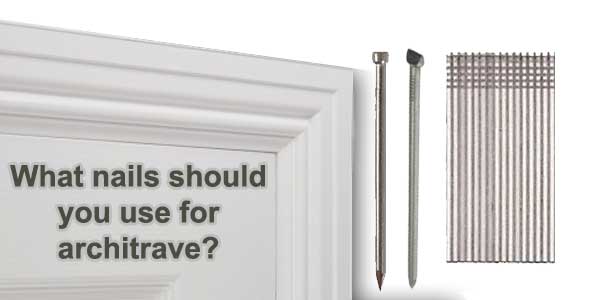
There are a few different nails you can use to fix architrave. If you are manually nailing with a hammer, then 40mm oval nails, or 40mm lost head nails are the best choice. If you are using a nail gun, then a second fix nail gun with 38-50mm brads is the tool you need.
A nail gun is by far the easiest option here, due to speed. You also have the added advantage, of your nails finishing beneath the surface when fitted with a nail gun. This will generally mean, there is less work to do with a nail punch after your architrave is fitted.
However, whilst fitting architrave and skirting with a nail gun is easier, its not always an option. These are expensive tools and for one off jobs, most people won’t have access to a 2nd fix nail gun.
For this reason, you will most likely be using a hammer and nails. Below we look at the two options for nailing your architrave and discuss the advantages and disadvantages of each.
Oval nails vs lost head nails for architrave
Both of these nails are very similar, the main difference is they have a slightly different shape. The oval nail is the most common type of nail used for architrave. However, it is not uncommon for a lost head nail to be used in its place.
Oval nails
Oval nails are not round, instead the nail body is slightly flattened. Also, the head is v shaped and tapers to the end of the nail. This means they are very easily hidden when used for jobs like architrave. The head results in a very small well-hidden hole.
Another advantage of an oval nail is they are less likely to split the grain in timber architrave. This is due to its flatter shape, which allows you to fix closer to the ends of your architrave without the fear of the timber splitting.
However, with their smaller head, they are slightly harder to punch. Due to the shape of the head, a nail punch will often move off the nail when hit, and this can result in your punch marking the architrave.
The way to mitigate this, is using a slightly wider punch with a recess in the head. This will stop the punch from slipping and allow you to bury the nail head below the timber surface.
Lost head nail
A lost head nail looks similar to an oval nail on first glance. However, on close inspection it is actually quite different. The nail has a round body, unlike the flatter oval nail. It also has a round head that is slightly wider than the body of the nail. This head has a flat top, making it ideal for finishing with a nail punch.
There are two main disadvantages with a lost head nail in architrave:
- The hole they create is bigger – This means you will need slightly more filler to hide the hole. However, they are not called lost head nails for no reason, and they do punch below the surface very easily, making them quite discreet and easy to fill.
- They are more likely to split timber architrave – Due to their round shape, a lost head nail is more likely to split the wood in solid timber architrave (especially softwood). This is more of an issue nearer the ends of the architrave.
Splitting the wood is far less of an issue in MDF architrave, which is also very common.
Overall both fixings will do a good job. However, you should be aware of the strengths and weaknesses of each type of nail.
How to hide nails in architrave
Once your architrave is fitted, you need to hide the fixings. This will provide a smooth seamless finish to the job.
If this is done properly, you should not be able to see the fixings once the wood has been decorated.
The first thing you need to do, is ensure all your nails are punched below the surface. This is relatively easy. All you will need for this job is a hammer and an appropriately sized nail punch. The nail punch shouldn’t be any bigger than the nail head, as this will maintain a smaller hole to fill.
Assuming you are painting the architrave, a standard wood filler can be used to fill the nail holes. This can be applied with a filler knife and sanded once dried. Your goal is to achieve a completely flat surface.
In some cases, there is a chance the filler will sink slightly when it dries. If this happens, apply a little more to get it flat. This is a slight nuisance, but it will ensure your fixings are invisible. If you neglect this step, the finish won’t be as good, and the fixing holes may be noticeable through the paint.
Nailing and filling for a natural finish
If you don’t intend to paint the architraves, and you are aiming for a natural wood finish, there are natural looking timber fillers that will do a good job. You can also use specialist wax to fill holes. Both of these can usually be colour matched quite well to the final finish, completely hiding your nail holes.
When a natural finish is required, oval nails would definitely be the preferred choice. This is mainly due to a smaller hole being created. A nail gun would be a good option for the exact same reason.
If you do use a nail gun to fit your architrave, the filling process is exactly the same. The only difference, is the holes are usually smaller and there will be less nail punching required.
Conclusion
So there you have it. The main nails used for architrave are oval head nails and lost head nails.
In an ideal world, you would definitely use a nail gun, as this will make the job far quicker and easier. However, if you are nailing manually, the first choice would be oval nails, and lost head nails would come in a close second. Both will do a decent job and are relatively easy to hide with a good filler.