In this article we will be looking at several different methods to lift chipboard flooring. Some are pretty easy, and others can be difficult. This mainly boils down to the way the boards are fixed. If they are nailed it can be a nightmare job and if they are screwed it can be a little easier.
Also, you may only be removing a small section, to access wires and pipes, in which case we can use a different method to remove a small section and access the space below.
How to lift chipboard flooring that has been screwed
If you are trying to lift chipboard flooring and the boards are screwed, you are in luck, this is the ideal scenario. Removing these boards should be reasonably simple. You will just need to remove all the screws and lift the boards.
However, there are a few things you may need to consider, especially if you are putting the floor back down.
Firstly, if the flooring was installed properly, the tongue and groove joints are likely to be glued. To break the seal and remove the tongue from the groove without much damage, you can use something like a wide bolster chisel. The swill open the gap up and completely break the seal of the glue. You could also use something thinner, like a paint scraper to get the gap going
This will be most difficult on your first board. Also, if there is no wiggle room to get it out, you may need to sacrifice the tongue to remove it.
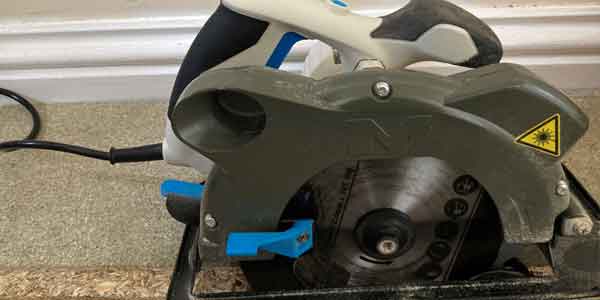
One way to do this, is run a circular saw straight down the joint. Alternatively, you could use something like a sharp wood chisel and chisel down the joint, to split the tongue away from the board.
Following the first board, every other board should be pretty easy to remove.
Potential issue with walls
Prior to removing the floorboards, you will probably need to remove skirting boards. In an ideal world, the chipboard flooring should just run up to the walls. However, there is a chance they might run under a stud wall. If this is the case, the job gets a little more complicated.
To solve this problem, you will need to cut the boards close to the wall. The easiest way to do this is with a circular saw. When you do this, your cut will be set slightly away from the wall. This will be the width of the guard on your circular saw (maybe 1inch). If you want it really tight, you could use a multi tool, but this will take much longer.
Warning! Be very careful to not hit pipes and wires below the floor when doing this. Chipboard flooring comes in 18mm and 22mm thickness in the UK. If you are somewhere else such as America, you will need to double check the thickness of boards in your area.
Since 18mm is the smallest, set your saw depth to 18mm and perform your first cut. If you aren’t getting through the board and it’s not close, adjust the depth to 22mm.
Finally, be aware that you may need to add some additional timber below the floor at the wall edge to carry the new flooring.
How to lift chipboard flooring that has been nailed
If your flooring is nailed, it will be more of a challenge to remove, especially the first board. Once your first section is up it will be much easier.
Obviously, you can’t just screw a nail out, so you need to find another way to remove them. One option is to chisel around the nail and expose the head, then get it out with a claw hammer, or a crowbar, or a combination of the two.
You could also cut a strip down the length of the board and remove a small section first, just to get the ball rolling.
Whichever way you decide to do it, you will probably struggle to save the tongues on these boards.
Once your first section is up, the rest is relatively simple, just use a crowbar to remove the remaining boards. And again, if you have boards running under walls, you will need to follow the same process we mentioned in the previous section and cut with a circular saw.
Lifting chipboard flooring to access pipes and wires
This is a completely different method and will involve removing small sections of floorboard, to access the wires and pipes running below. This could be for repairs or new installations.
Either way, you probably won’t need to remove the entire floor, just small sections.
The best way to do this, is to cut out square or rectangular sections of the flooring. The ideal access hole should have two of its parallel sides cut along a joist. So, if you are cutting a rectangular hole, two sides should be on a joist.
Finding joists is very easy, just look where the screws/nails are, as the boards will be fixed along the joists. simply mark a line next to the fixings (so you’re not hitting them) and run your circular saw down the line. Repeat this on the parallel joist to create the two sides of your rectangle. Following this, perform two more cuts, one at the top, and one at the bottom to complete the rectangular cut out.
Now your floorboard should easily lift out and give you access. When you want to put it back, simply replace the piece you cut out, and screw in place. You can also add some additional supporting timber below the top and bottom cuts to add extra support.
To do this, simply cut a small piece of wood, slightly longer than the length of the cut and hold it under the edge of the hole. Hold it firmly and screw down through the floor into the wood, this will pull it up tight with the bottom of the floorboard and hold it firmly in place, creating a ledge for the top and bottom cuts to sit on.
Conclusion
Lifting chipboard flooring is not the simplest job. However, the tips in this article should give you a solution for every scenario.
Obviously, the amount of care you take, will depend on your intentions for the boards. If they are being reused, then extra time and care is required. However, if they are being replaced then you can potentially be more aggressive pulling them up.


