• Skip to primary navigation
  • Skip to main content
  • Skip to primary sidebar

The DIY Fix

Answering all your DIY questions

Categories

  • Adhesives
  • Bricklaying
  • Carpentry
  • Carpentry tools
  • Condensation
  • Conservatory
  • Damp
  • Damp Proof Membranes
  • Damp Proof Meters
  • Damp Proof Paint
  • Damp Proofing
  • Damp proofing Basements
  • Damp smell
  • Damp Survey
  • Decking
  • Decorating
  • DIY Garden Room
  • doors and casings
  • Dot Dab
  • DPC
  • Drywall
  • Engineered wood
  • Fencing
  • Floorboards
  • General faq
  • Health
  • Humidity
  • Injectable DPC
  • Insulation
  • Internal Damp
  • Joinery power tools
  • Joists
  • Kitchen fitting
  • Laminate
  • Leaking Roof
  • Penetrating Damp
  • pipe boxing
  • plaster boards
  • Plastering
  • Projects
  • Rising Damp
  • Roof timbers
  • Skimming
  • Skirting & Architrave
  • Structural damage
  • Studwork
  • Tanking
  • Tanking Slurry
  • Tool Reviews
  • Wet Rot
  • Windows
  • Woodworm
  • Carpentry
    • Floorboards
    • Skirting & Architrave
    • Joists
    • Studwork
    • doors and casings
    • Decking
    • Engineered wood
    • pipe boxing
    • Carpentry tools
    • Fencing
    • Joinery power tools
    • Kitchen fitting
    • Laminate
    • Roof timbers
    • Windows
  • Plastering
    • Dot Dab
    • Skimming
    • plaster boards
  • Tool Reviews
  • Projects
  • Plans
  • More
    • Bricklaying
    • Insulation
    • Adhesives
  • Privacy Policy
  • Contact Us
  • About Us

Insulation

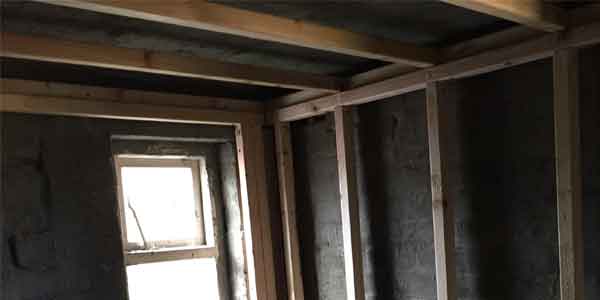
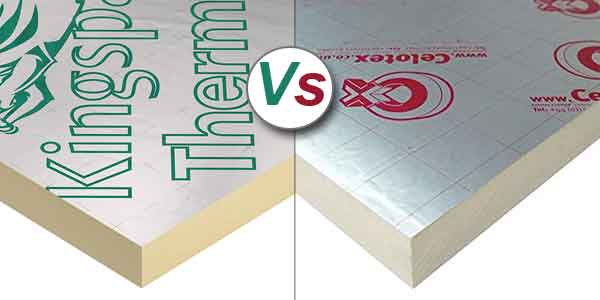
Celotex vs Kingspan – Which insulation is better?

April 10, 2023 by Carl Lewis

Both Celotex and Kingspan are popular types of insulation available in the UK. Both offer a range of products, for insulating different areas of a property. Their most common products are polyisocyanurate (PIR) insulation boards. However, Kingspan also offers another type of rigid insulation known as Kooltherm. This is a premium product made using a phenolic foam and is considered an upgrade from PIR.

The standard type of PIR insulation board is easy to cut and install in a variety of areas. In this article, we will briefly look at Celotex vs Kingspan, to determine if there are any major differences between each brand of insulation, and whether one brand is better than the other.

celotex vs kingspan

Celotex vs Kingspan product range

Both of these brands offer a similar range of products. However, there are some differences. Both offer PIR insulation boards. These come in a range of dimensions, which offer quite similar thermal values based on their thickness.

They also both produce insulated plasterboards which again are quite similar in terms of performance.

However, Kingspan also offer several other products. These include:

  • Kooltherm insulation boards – This is a high-performance insulation material made from phenolic foam. This material has lower thermal conductivity than standard PIR insulation products.

    When looking at products of the same thickness, phenolic foam will provide around 19% improvement in thermal conductivity. As a result, thinner boards can be used to achieve the same level of insulation. With that said, they are considerably more expensive than PIR.

  • Insulated wall and roof panelling – These are panels that are commonly used in commercial, industrial, and retail buildings. The panels consist of Kingspan’s proprietary QuadCore insulation material, sandwiched between two layers of metal cladding. This usually has a smooth surface for walls and a corrugated finish for roofing applications.

  • K-Roc Framing Slab – This is a type of rock mineral slab. It is primarily used with metal framing systems.

Kingspan also offer several other products which can be seen on their website here. Therefore when comparing Celotex vs Kingspan based on their range of products, Kingspan does win. However, for standard PIR insulation, both companies do offer very similar products. Both provide very similar thermal performance and cutting and installing is almost exactly the same.

Kingspan vs Celotex price comparison

If you are just looking for a standard PIR insulation, then both of these brands can offer a similar quality of product. This means that your final decision will often boil down to price.

As a general rule, Kingspan does tend to be more expensive per m2. However, the price you pay can vary widely based on the supplier. This can be affected by your location in the country, but it can also be quite different from one local provider to another.

A good example of this, would be buying from a large DIY store, such as B&Q, or Wickes, vs buying from a builder’s merchant. The latter will usually be significantly cheaper. You may also get even better deals when you buy larger amounts.

The key to getting the best price is shopping around. You will often be surprised by how much prices can vary even between more competitive builders’ merchants.

With that said, if we were to compare average prices, Kingspan would usually be the most expensive. As a rule of thumb, you can expect to pay 10-20% more for a like-for-like Kingspan insulation product vs Celotex.

If you are choosing a more premium product such as Kooltherm, this number could be significantly higher, and it would be quite common to pay 50% more compared with a standard PIR product.

Based on average prices, Celotex wins and in the vast majority of cases it will be the cheaper option. With that said, you should always shop around. There are deals out there and you may occasionally find suppliers where Kingspan ends up being the cheaper option.

Availability of Kingspan and Celotex

Both Celotex and Kingspan are popular well-known brands. As a result, they are stocked throughout the UK and have wide availability. They are also widely available online, which means you can easily order via suppliers’ websites and have products delivered.

Locally the availability will depend on the supplier, but both will usually be available when you shop around.

One other thing that can affect availability, is the specific product type and thickness. There are less-common products that may not be as widely available. In this case you may need to order online.

It is also worth noting, that these are not the only brands available. You will also find other brands that have similar products, especially when it comes to standard PIR insulation.

As a general rule, these will have very similar thermal performance when compared with like-for-like products.

Conclusion

In conclusion, when we compare Celotex vs Kingspan, they are very similar types of insulation. However, each has its own range of products and there are some differences. The exact type, size and thickness of insulation will depend on what it is being used for.

When it comes to the most commonly used types of rigid insulation, both brands are very close in terms of performance. For example 100mm of PIR insulation from Kingspan and Celotex will provide very similar thermal performance (if not identical).

Often your final decision will come down to cost, and in most cases Celotex will be the cheaper option.

Filed Under: Insulation

How to cut Celotex, Kingspan and other PIR board

December 20, 2022 by Carl Lewis

Insulation is a requirement in new build properties. However, this was not always the case in older properties. Therefore, if you do find your home cold, you may decide to install insulation yourself.

A common area people install rigid insulation boards, such as Celotex, is in their roof space. It can also be installed in new stud walls and even in floors. However, for this article we will assume you are insulating your roof space.

The most common method for cutting insulation such as Celotex, is using a handsaw. The insulation should be cut tight between the rafters, and ideally the boards will have a friction fit. This should hold them securely in place without any gaps.

Ideally, you don’t want any gaps around your insulation, as this could affect its thermal performance. In the case where small gaps are present, you should aim to fill these with additional insulation. You can also use an expanding foam to completely fill gaps and hold the boards in place.

how to cut Celotex

If you are installing a thinner insulation (under 40mm), you can also cut boards with a knife. This can actually give a really clean cut, with very little dust and mess created.

The technique is similar to cutting plasterboard. Essentially you score one side of the board with your knife, using a straight edge. Following this, you can turn the board over and snap it along the cut.

This technique is not effective with thicker boards. Your Stanley knife will only cut in 10-15mm, so you are unlikely to get a clean cut. Thicker boards can easily snap wider on the uncut side. If this happens, you will still need to cut the excess away, which defeats the object of using a knife in the first place.

How to cut Celotex with a hand saw

When you cut Celotex with a handsaw, your goal should be a neat tightly fitting cut. To achieve this, there are a few things you should do:

  1. Use a fine-tooth hands saw – This will give you a cleaner cut in the foil face, and reduce the dust created when cutting. You can see a good quality, low-cost handsaw that we recommend by clicking here

  2. Measure twice cut once – What this really means, is to measure your cuts correctly. Ideally your insulation should fit snugly between the rafters, with a friction fit that holds them in place.

  3. Cut at a slight angle – Over the years I have fitted a lot of rigid insulation, such as Celotex and Kingspan. One technique that works very well, is cutting the sheets at a very slight angle. By doing this, the back of the board will fit in easily, with the front being tight.

    When doing this, you can even cut a little wide on the front edge (1-2mm), then run a handsaw down the front edge between the rafter, to remove the excess and ease it in tightly.

  4. Cut twice for uneven openings – In some cases, rafters will be slightly uneven, and the gap may be different at each end. In this case cut a straight piece to the widest measurement.

    By doing this, you leave the insulation sheet straight for your next cut. But the piece you just cut can be trimmed down to fit.

    Always remember, you can take it off, but you can’t put it back on. It’s better to cut too big and adjust, rather than to cut it too small and have a loose fit.

Ways to make fitting insulation easier

Following the above recommendations, should enable you to cut and fit your insulation correctly.

However, there are a few tools and products that can make the process easier. These can be seen below:

  • Dust mask – The dust created from rigid foam insulation is quite unpleasant. Using a mask will make the job much more bearable. A pair of goggles is also recommended.

  • Stanley knife – Even if you aren’t cutting thin boards, a knife can come in handy for little jobs. Mostly, it will be used to remove small bits of insulation from the edges. This will enable you to fit tight boards a little easier.

  • Surform – This is another tool that can help you adjust the size of your insulation. A surform is a bit like a plane. It has a perforated metal sheet on the bottom that resembles a food grater. This can be very useful for shaving thickness, to help your insulation fit.

    One thing you need to be aware of, is this causes a lot of mess and dust, making the need for your mask even greater.

  • Six-foot level or straight edge – A long straight edge will make cutting in a straight line much easier. Ideally a full set of levels would be even better. This way you can use smaller levels when a big six-footer isn’t required. You can see some good levels by clicking here

  • Insulation tape – This will enable you to tape all the joints between your insulation. This serves two purposes. Firstly, it seals any gaps, and secondly it can help to hold any slightly loose pieces.

  • Expanding foam – Where gaps are present, or the insulation is slightly loose, a squirt of foam will easily fill and hold everything in place.

Conclusion

Cutting Celotex and similar insulation boards is not very complicated. You don’t need any fancy tools. In fact, the best tool for the job is usually a hand saw.

Ideally, this should be a fine-toothed saw, which will help to achieve the neatest cuts. Insulation is very easy to cut manually, so using any kind of power tool is unnecessary.

In order to achieve a good result, you need to make sure you measure and cut your insulation correctly. This will ensure they fit nice and snug between the roof timbers. Resulting in the best possible thermal performance.  

Filed Under: Insulation

Do I need a vapour barrier with Celotex

December 16, 2022 by Carl Lewis

Celotex is one of the largest manufacturers of rigid foam insulation in the UK. Their products can be used in a variety of installations. Including:

  • Roofs (flat and pitched)
  • External cavity walls
  • Internal stud walls
  • Floors
  • Etc.

In some cases, Celotex may be used in combination with an additional vapour barrier. This is most common when used in roofs, or insulation on the inside of external walls.

do i need a vapour barrier with celotex

Celotex does have a built-in vapour barrier layer, so it is already quite effective in this regard. If used for roof insulation, a common way of sealing the boards is to use a foil tape to seal any of the joints between the insulation sheets.

The main goal is to reduce air movement through the insulation, which will reduce condensation on the cold side between the insulation and the roof. This avoids the risk of excess moisture and condensation affecting the roof timbers.

It will also reduce the risk of moisture passing through to the internal surfaces, which could result in damage to the plaster and decorations.

In a roof, rigid foam insulation like Celotex, is generally fitted between the rafters. In order to do this correctly, the insulation board should be fitted tightly, with little or no gaps. If there are small gaps between the timber and the insulation, a common fix is a squirt of expanding foam, and also taping joints between boards.

Gaps do cause an issue with regards to a consistent vapour barrier. They can also reduce the performance of the insulation and result in cold spots. These cold spots can result in condensation, which can lead to damp patches and even mould.

Adding additional vapour barrier with Celotex

As we have already mentioned, the insulation already has a vapour barrier layer. However, this can be improved further in several ways. Some of the most common are:

  • Gapotape
  • Over boarding with additional insulation
  • Separate vapour barrier
  • Foil backed plasterboard

Gapotape

This is a relatively new product, and it solves the issue of gaps around the insulation. Spaces between the timber are often uneven, there could also be bows and twists in the wood, that cause gaps. This means it can be very difficult to get every board fitting tightly.

If you do fail to fit them tightly, the insulations vapour barrier and its overall thermal performance is affected.

Gapotape is a product that you add to the sides of your insulation. It is made from a softer foam material, which allows you to friction fit your boards between the timber rafters.

To do this, you cut the width of your insulation 8-10mm thinner than the gap between the timber, then the Gapotape fills the gap.

This works because the Gapotape is softer and more flexible than the rigid board. Therefore, it evens out any inaccuracies between the board cut and the timbers.

You can see a video of how this product works below:

Over boarding with additional insulation

Another way to add an additional vapour barrier is to add additional insulation over the top.

Once you have added the insulation between the rafters and sealed all the gaps, you can overlay another layer of insulation (20mm for example). This would be fixed to the face edge of the rafters.

When doing this, you should aim to stagger the joints, this will reduce the risk of any vapour or cold passing through the boards. You should also tape all the joints completely sealing the wall.

This additional layer of insulation, will provide extra thermal performance, and even out any cold spots. As well as completely sealing the surface and providing a fantastic vapour barrier.

Adding a separate vapour barrier

I have personally never used this method. However, it is a viable option. This simply involves using a sheet of waterproof membrane between your insulation and the finished plasterboard.

The sheet could be stapled in place and overlapped with all the joints taped. This would result in a completely sealed vapour barrier. Following this, you can simply add your plaster board over the top.

Foil backed (vapour barrier) plasterboard

This is a method I have used many times in the past. I personally prefer it to the previous option of a separate vapour barrier. This is mainly due to less hassle and ease of installation.

As we mentioned previously, Celotex already has a vapour barrier layer. The foil backing on this type of plasterboard is also a vapour barrier.

If you do a good job of fitting and sealing your insulation, the additional barrier provided with this plasterboard, will create a complete, unbroken vapour barrier.

If it is used in combination with Celotex and something like Gapotape, the finish would be far superior to just adding insulation and over boarding with normal plasterboards.

Times you don’t need a vapour barrier with Celotex

Using a vapour barrier with Celotex is not required in many other instances. If there is no contact with a roof or external wall, its use is unnecessary. This means you don’t need a vapour barrier for floor insulation, stud walls or any other type of internal insulation.

With that said, you should still aim to keep your cuts nice and tight, and you can still use tape and other materials to completely seal gaps. This will ensure you get high thermal performance from your insulation.

Conclusion

You will benefit from a vapour barrier with Celotex, in certain situations. One of the primary examples, is when you are insulating a roof.

The main consideration, is whether there is a risk of vapour penetration. As well as the risk of gaps and a cold void behind the insulation. This can result in condensation, which can lead to future problems.

In my opinion, a combination of Gapotape and foil backed plasterboards, is one of the best solutions, for both thermal performance, and a high-quality vapour barrier.

Filed Under: Insulation

Insulating a single brick wall from inside – 2 methods

November 20, 2022 by Carl Lewis

If you live in an older property, your home may lack insulation. Even if you do have insulation, it is likely below the new building regulations standards. These regulations have been updated most recently in June of 2022.

As of this date, all cavity wall construction, should be equipped with 150mm of insulation. This makes modern homes much more energy efficient, meaning far less heat is lost via the walls

However, even if you live in an older property, there are still several ways you can add extra insulation.

If your home is built with a cavity, there are certain options, such as injecting insulation from the outside. This process involves drilling holes in the external skin of the property. Following this, insulation is blown through the holes filling the cavity.

However, not all walls have a cavity. If you are trying to insulate a single brick wall from inside, then you will need a different strategy.

One of the most popular ways to add insulation to in internal wall, is via insulated plasterboard. You also have the option to create an internal stud wall, where insulation is added between the studs. This will take up a little more space. However, it will also create a small cavity, separating your new insulated wall from the external wall.

Insulating a single brick wall from inside

When do you need to insulate a wall from inside?

Cavity wall construction, is by far the most popular construction method used in modern homes. Anything else is generally considered non-standard construction. However, there are still many buildings that have not been built with a cavity.

Things like garages and outbuildings, are often single skin brick walls. If you want to insulate these types of building, you will most likely need to insulate from inside.

Also, cavity walls in properties have only been around since the 1920’s. Prior to this, houses were built using solid wall construction. This consists of a large portion of the UK housing stock.

According to a household energy efficiency report from the government in March of 2021 (which you can see here), there are roughly 8.6 million homes in the UK built with solid walls. Of these properties, only around 9% are insulated, either internally or externally.

According to the same report, even 30% of cavity wall homes have no insulation. This is over 6 million properties that have a cavity, but still don’t have insulation. Because a cavity is present, filling with an injected insulation is the most common option. However, even cavity wall construction could still be insulated from the inside.

Insulating a single skin wall from inside – Method 1

The most common way to insulate your property from inside is with a type of insulated plasterboard. This is fixed to the internal walls and will result in similar U-values to a cavity wall insulation.

Insulated plasterboards consist of a plasterboard face (usually 12.5mm) and a rigid insulation panel fixed to the back. The insulation, will usually rage somewhere between 20-75mm in thickness.

There are two main ways to fix insulated plasterboard. These are:

  • Dot and dab the insulated boards
  • Fixing them to timber battens

Dot and dab is a drywall adhesive. To fix boards with this method, the adhesive is added to the wall in dabs, with a solid line of adhesive around the edges of each board. As well as additional adhesive around back boxes, for things like sockets and switches.

The adhesive sets extremely hard, sticking the insulation board to the wall. In addition, the solid lines of adhesive around the edges, prevent cold air from moving behind the boards and escaping into the property.

The second way to attach insulated plasterboard is via timber battens. When using this method, the timber battens are fixed to the wall with plugs and screws. Following this, the boards can be screwed directly to the timber battens.

You should also add a strip of DPM behind the battens. This will give additional protection and avoid moisture passing from the external wall.

Both of these methods will add around 20-25mm behind the insulated plasterboard, so there is very little difference in the finish. However, I would argue that timber battens is the better method, as it gives additional protection from damp, due to the added DPM.

Insulating a single skin wall from inside – Method 2

Your second option for adding insulation internally, is building an internal stud wall. This method will take up a little more space. However, it does also have some benefits.

For this method you would not use an insulated plasterboard. Instead, insulation would be added between the studs in your wall. If you are using 50x75mm studwork, then a similar thickness of insulation could be used.

Your best option for this insulation is a rigid board, such as Kingspan or Celotex. A softer insulation like rockwool, would not be suitable. There is no plaster board on the other side of the wall, so fiberglass insulation would be more prone to slipping down inside the studwork.

When installing the stud wall, you should have a slight gap between the timber and the external wall. Usually something like 20-30mm will be sufficient.

There are a few benefits to this method, which include:

  • A cavity behind the wall allows airflow and can reduce condensation.
  • Damp can’t pass between the walls because there is a gap.
  • You can add an additional vapour barrier with foil backed boards.
  • Your wall can be sat on a strip of DPM to further reduce the risk of damp.

As you can see, most of these benefits are avoiding potential issues from the outside wall. This method is better at avoiding these issues, because it is built completely separate from the external wall.

Any of these solutions are a valid way to do this job. The one you choose will depend on your own skill set.

For me I would generally opt for either battens or internal studwork. However, I am a joiner by trade, so this does lean into my own personal skills.

Conclusion

Insulating a single brick or stone wall from inside is a wise choice, especially if you don’t already have any insulation. Roughly 30% of heat is lost through a property’s walls. Therefore, adding insulation will reduce bills, and help your property to maintain a more balanced, comfortable temperature.

Insulation is also possible from outside. However, this is a far more expensive and difficult process. As a result, insulating from inside is much more popular.

Filed Under: Insulation

Best way of insulating a single skin garage – 4 options

November 4, 2022 by Carl Lewis

A garage is a useful space for any home. It can be used for a variety of purposes, such as:

  • Storing vehicles
  • Garden equipment
  • tool storage
  • general household storage
  • etc.

It could even be converted into a more usable room. For example, a gym, or a home office. However, most garages do have a problem, and that is how they are built. This is usually a single skinned structure.

If the garage is just for the car, or maybe some tools and a lawnmower, this Is not much of an issue. But when it comes to storing more delicate items, or using the garage as an actual room, this can cause problems.

The main issue is cold and damp. Because the walls are single skin, they don’t tend to be very warm. They are also at a far greater risk of penetrating damp.

Due to the walls being a single skin, this can cause a problem. How do you make it warmer and less damp? The obvious solution is insulation, but how do you insulate a single skin garage wall? There is no cavity, so that is not an option.

Really you only have two options:

  1. Insulate from inside
  2. Add insulation to the outside

For internal insulation, there are two common options. The first is to install insulated plasterboards, and the second is to build some kind of internal stud wall, that can be used to house insulation.

To insulate a single skin garage from the outside, you can add external insulation panels. These are fixed to the outside wall and then rendered over.

Insulating a single skin garage with insulated plasterboard

Your first option is using an insulated plasterboard. These are essentially a standard plasterboard, with a rigid foam insulation attached to the back of the boards.

Insulated plasterboards usually range in thickness, from around 25 – 80mm (excluding plasterboard). This will vary slightly from different manufacturers. The thickness you choose will depend on how the garage will be used. Obviously, a thicker insulation will hold heat in for longer.

When fitting insulated plasterboard you have two options:

  1. Dot and Dab
  2. Fix timber battens and screw the boards.

Dot and dab can be a good option if the wall is not suffering from any damp. This is done by applying drywall adhesive dabs to the wall and fitting the board in place. You wall also need to use additional fixings (special plugs and screws) for additional support.

The additional fixings are mainly used in case of a fire. In the event of a fire, the insulation will burn fastest. This would cause the boards to fall away from the dabs. Adding additional screws will stop this from happening.

Your second option is attaching timber battens to the wall and screwing the boards directly to the timber. The battens can be fixed with plugs and screws to ensure a solid fixing. You can also add a DPM behind the batten. This will avoid any moisture passing from the wall into the timber.

Following this, you can screw the insulated plasterboards onto the timber battens. Personally this is my preferred method of the two options.

Adding an insulated stud wall

Another option for insulating a single skin garage, is building an internal stud wall. This can be a good option for a couple of reasons. Firstly, it will provide the insulation you require. Also, on top of that, it will create a cavity between the brick wall and the studwork.

If you already have an air-brick in your garage wall, you can also add a vent to the stud wall. This will give the garage better air circulation and reduce condensation.

The next benefit is it will be far more difficult for damp to pass from the external wall to the stud wall. You can improve this even further by adding a DPM under your stud wall and installing foil backed plasterboards to create a vapour barrier.

The only disadvantage of this method is it will take up more space. With that said, insulated plasterboards will also eat into the space quite a bit, so there isn’t much of a difference.

Below you can see a picture of a wall I personally used this method on. I built the stud wall with 50 x 47mm timber. This is a little smaller than standard stud work timber. However, it was a small space and I really wanted to save as much room as possible. I had a 25mm gap from the wall, and I used 12.5mm plasterboard.

best way of insulating a single skin garage

As a result, this added around 80mm to each wall. If you used a standard 3×2 stud wall, you could add an extra 20-25mm to this.

Insulating a single skin garage from outside

Your final option is adding insulation outside. This is quite a specialist job, so you would usually need to hire a professional team to do the work.

This technique uses insulated panels which are fixed to the walls. To do this, the entire wall needs priming, then the insulation is stuck to the existing wall with an adhesive. Following this, mechanical fixings are added to completely secure the insulation.

Next all the corners and edges have beading attached, and an adhesive and fiberglass mesh is added to the entire surface.

Finally the finishing render is added over the top.

As you can see, this is not a DIY project. If you do want external insulation installing, then a professional team is required.

Another thing to consider, is whether your garage is attached to your house. If it is, you would probably need to insulate the entire building. It would look rather odd if you only insulated and rendered your garage.

Conclusion

So these are your main options. In my personal opinion, the best way to insulate a single skin garage, is either:

  • Insulated plasterboard fixed to battens.
  • Or an internal stud wall with insulation

I feel that both of these are doable for the average DIY’er. Also, when using insulated plasterboards, I think battens are better than dot and dab. Not only is it easier to install, but you can also add extra protection from damp with a DPM behind the timber.

A stud wall gives several advantages, such as creating a cavity, insulation is easy to install between studs, and you can use foil backed plasterboards to create a vapour barrier.

The external option is certainly not a DIY project, and it will be significantly more expensive.

Filed Under: Insulation

Primary Sidebar

Copyright © 2025 · WordPress · Log in