• Skip to primary navigation
  • Skip to main content
  • Skip to primary sidebar

The DIY Fix

Answering all your DIY questions

Categories

  • Adhesives
  • Bricklaying
  • Carpentry
  • Carpentry tools
  • Condensation
  • Conservatory
  • Damp
  • Damp Proof Membranes
  • Damp Proof Meters
  • Damp Proof Paint
  • Damp Proofing
  • Damp proofing Basements
  • Damp smell
  • Damp Survey
  • Decking
  • Decorating
  • DIY Garden Room
  • doors and casings
  • Dot Dab
  • DPC
  • Drywall
  • Engineered wood
  • Fencing
  • Floorboards
  • General faq
  • Health
  • Humidity
  • Injectable DPC
  • Insulation
  • Internal Damp
  • Joinery power tools
  • Joists
  • Kitchen fitting
  • Laminate
  • Leaking Roof
  • Penetrating Damp
  • pipe boxing
  • plaster boards
  • Plastering
  • Projects
  • Rising Damp
  • Roof timbers
  • Skimming
  • Skirting & Architrave
  • Structural damage
  • Studwork
  • Tanking
  • Tanking Slurry
  • Tool Reviews
  • Wet Rot
  • Windows
  • Woodworm
  • Carpentry
    • Floorboards
    • Skirting & Architrave
    • Joists
    • Studwork
    • doors and casings
    • Decking
    • Engineered wood
    • pipe boxing
    • Carpentry tools
    • Fencing
    • Joinery power tools
    • Kitchen fitting
    • Laminate
    • Roof timbers
    • Windows
  • Plastering
    • Dot Dab
    • Skimming
    • plaster boards
  • Tool Reviews
  • Projects
  • Plans
  • More
    • Bricklaying
    • Insulation
    • Adhesives
  • Privacy Policy
  • Contact Us
  • About Us

Engineered wood

How to stop chipboard floors creaking – And why it happens

November 29, 2022 by Carl Lewis

Creaking chipboard flooring is usually the result of one of the following issues:

  1. The boards are rubbing against each other
  2. Fixings are rubbing against the chipboard.

More often than not, this is due to poor installation, and you can usually fix the issue quite easily, with some well-placed screws.

Chipboard flooring is quite common, especially in modern, new build properties. This is mainly because it is affordable and easy to install. Sheets generally come in 2400mm lengths at a width of 600mm. Therefore, one sheet is the equivalent of around 6 standard timber floorboards.

how to stop chipboard floors creaking

This means less measuring and cutting. As well as less fixings required in a full board. The result is a much quicker installation.

In order to install woodchip flooring correctly, a wood glue should be applied to the joist and the tongue and groove joint on the floorboards. Following this, the chipboard should be screwed down to the joists. if this is done correctly, then chipboard flooring is far less likely to move and creak.

The screws will give a very solid tight fixing, that prevents the chipboard from moving, and the glue will cause the tongue and groove to form a much stronger bond when it sets.

Why does chipboard flooring creak

As we mentioned previously, creaking is usually the result of wood rubbing on the fixings, or the boards rubbing against each other. The risk of either happening, is massively reduced by gluing and screwing.

The reason it does end up happening, is usually due to rushed, or low-quality installation. The most common reasons are a lack of glue added in the joints, and nailing the chipboard, as opposed to screwing.

This could be a specification applied by the housebuilder themselves to speed up the job and save money.

Also, if the people installing the floors are working on price work, they may be incentivised to install the flooring quicker. Price work (or piece work) means they are not on a daily or hourly rate. Instead they are paid on a fixed rate per unit. This could be something like £x per meter of flooring.

If you are being paid per meter, or some similar metric, then nailing the floorboards and neglecting the glue will save a huge amount of time, resulting in far more work completed. As a result, this will mean more money.

The fitters will often use ring shank nails and a nail gun to achieve a more solid fixing. However, this is still nowhere near as good as screwing them down. As the boards expand and contract due to temperature and humidity even a ring shank nail can potentially loose grip.

If they use standard smooth nails, this will be even worse and greatly increase the risk of creaking floors.

Fixing creaks in chipboard flooring

To fix creaking, you need to identify where it’s coming from. This is pretty simple. You can just walk on the floor to find the areas that are making noise.

Once you identify the area you would like to fix, you can pull back the flooring to access the chipboard below. For carpet this will just involve pulling the carpet away from the grippers and rolling it back.

If the floor has been nailed, this is almost definitely the reason its creaking. If you stand on the exposed board, you may even be able to see movement.

By fixing it down more securely with screws, you should completely eliminate any creaking.

However, before you start, you should consider whether there are any pipes or wires below the flooring.

In modern properties, where chipboard is more common, electrics and plumbing usually run through the centre of the joists. Therefore, in a property with 195mm joists, pipes should be at least 90mm below the top of your floorboards.

Older properties will often have pipes notched into the top of joists. Obviously, this has a greater risk when randomly screwing through your floor, which means, you may need to investigate further.

Another thing to consider, is where water needs to run to. Look for radiators, bathrooms etc. Try to figure out how likely a pipe is to be running where you are screwing.

Finally, to be on the safe side, you should know where your stop tap is, just in case.

It would be very unlucky to screw through a pipe, but it does happen.

Once you are confident its safe, you can apply screws to the chipboard flooring. In most cases this will resolve the issue and completely stop any movement and creaking from the chipboard.

Adding glue to joints

Another potential is no glue in the tongue and groove joints. We certainly don’t want to lift the entire chipboard floor, just to glue joints. However, it is a good idea to try and get some glue in there, to reduce movement between the boards.

One easy way to do this, is by diluting a standard wood glue with water and brushing it into the joints. To do this, you want it quite wet, as this will allow the glue to seep into the joint. The extra moisture may also cause the tongue and groove to expand, which will further tighten the bond between the chipboard sheets.

The glue will take a little longer to go off, due to the extra water. However, once it sets, it should produce a decent amount of grip inside the tongue and groove.

Conclusion

Creaks in chipboard flooring are quite common. However, it is a relatively easy fix.

Usually issues have been caused due to poor fitting. and most are easy to fix with the boards in place. All you really need to get rid of most noises in the floor is some screws and a standard wood glue.

Just remember to always check for pipes before you start screwing.

Filed Under: Engineered wood

How to waterproof OSB board UK

November 29, 2022 by Carl Lewis

In this article, we will be looking at ways to waterproof OSB (orient strand board). Whilst this product is already quite water resistant, it is not fully waterproof. This means, it will deteriorate over time if it is exposed to high levels of water.

OSB is an engineered sheet material, made from chips of wood combined with synthetic resin adhesives. It is the adhesive that gives it water-resistant qualities. However, it is still wood, which means it can soak up moisture and degrade over time.

In terms of strength, durability, and moisture resistance, it is similar to plywood. However, the manufacturing process is different.

how to waterproof osb board uk

When OSB is made, small chips of wood are soaked in adhesive, this is then compressed in a thermal press, which activates and cures to a hard, solid finish.

The way woodchips (or strands) are oriented looks quite uneven. However, it is aligned differently in different layers. As a result, this increases the boards strength.

Due to OSB’s strength, it is a very popular alternative to structural plywood. This is particularly true in North America, where it is commonly used in construction to create structural panels.

In the UK, OSB isn’t used as frequently as in America. However, it is still a product you will find in most builder’s merchants, or large DIY stores.

The main reason it is used less in the UK, is simply due to different construction methods. In America most property is timber frame. However, in the UK this is considered non-standard construction.

With that said, we do build some timber framed homes in the UK. When we do, the insulated panels are usually made from OSB.

It is also popular for things like making furniture, flooring materials, packing, and boarding.

Waterproofing OSB board

As we have already mentioned OSB is water resistant (not waterproof). This means it can withstand a certain level of moisture.

In the UK the main grade of orient strand board used in construction is OSB/3. This is designed to be load bearing and resistant to high levels of humidity. If you visit a builder’s merchant to buy OSB, it is very likely that it will be OSB/3.

OSB grades 0, 1, & 2, lack water resistant properties. These are intended for internal use, such as making furniture.

There is also a higher grade 4, which is a stronger material. This has similar properties to OSB 3, as it uses the same type of adhesive (Phenol formaldehyde resins). However, it has greater load bearing capabilities. Plus, it can withstand around 20% higher levels of moisture. However, even OSB/4 is not fully waterproof.

If you intend to use OSB outdoors, you will need to add additional waterproofing. The type of treatment you use will depend on the finish you require.

If you are looking for a clear finish, then your best bet is something like Roxil Wood Protection Liquid. This will completely waterproof your OSB, and it gives 10+ years of protection.

You can read more about this product and read customer reviews by clicking here

Some other options for waterproofing your OSB include:

  • Stain – A good wood stain can give a nice finish to your OSB board
  • Exterior wood paint – Again this can give a nice finish and allows you to colour the surface of your OSB
  • Blackjack – This could be applied as a finished coat. Alternatively, you could use a blackjack felt adhesive and apply felt over the top. This would be good for a shed or some other outdoor storage where OSB is used.

Ensure that you fully seal your OSB

However you decide to treat your OSB, you should make sure you seal all edges. This includes the front and back face of the board, as well as all the edges. By doing this, you are completely sealing the board and stopping water from soaking into the wood.

Another important thing to remember, is to reseal any cuts. Depending on how you are using the OSB, there is a chance you will need to cut the boards.

If you seal the boards first and then cut them, you have provided a route for moisture to enter the board. In order to avoid this, you will need to seal any cuts with your chosen wood sealer.

If water can soak into the sheet through a cut, or an area that has not been sealed, it will ruin the board. Even a small area that is not sealed will quickly soak up moisture. This will cause the board to swell and deteriorate.

A fully sealed board, can be the difference between a sheet that lasts outdoors for 10+ years and one that needs replacing in the next one year.

Conclusion

OSB is a popular engineered wood, and it has several benefits, including strength and moisture resistance. This makes it a popular alternative to plywood, at a slightly lower cost.

However, just like plywood, OSB is not fully waterproof. This means you will need to a add additional waterproofing treatments if you intend to use this product outside.

Filed Under: Engineered wood

Best saw for cutting MDF – Manual and power tools

November 25, 2022 by Carl Lewis

MDF is a very versatile material. It is used in a wide range of products, such as:

  • Skirting and architrave
  • Window boards
  • Furniture
  • Shelving
  • Flooring
  • Etc.

Due to this, MDF can be cut with several different types of saw. The one you use, will depend on several factors. Including, the product that is being cut, where it is being cut, and where it is being fitted.

You also have the option of cutting manually, with something like a hand saw, or a coping saw. As well as cutting with a power tool, such as a chop saw, a jigsaw, or a circular saw.

best saw for cutting mdf

Any of these could be considered the best saw for cutting MDF, in different situations.

Below we will look at a few examples of when you might cut MDF. Including the best power tool and manual saw for the job.

Best saw for cutting sheets of MDF

MDF is available in sheets and can be used for a variety of applications. The most common sheet size is 2440 x 1220mm (smaller sizes are available). In terms of thickness, it can range anywhere between 3mm and 25mm.

Obviously, if you choose to cut manually, a thinner board is much less labour intensive. However, you can still comfortably cut thicker MDF with a hand saw.

The most common MDF thickness in construction and DIY, are 12mm and 18mm. Both of these can certainly be cut by hand if you are able to cut straight.

Best Handsaw for cutting sheets of MDF (personal opinion)

The best hand saw for the job is going to be subjective. Some people will prefer different saws and brands over others.

Therefore, I can only give you my opinion from personal experience.

Over the years, I have tried and used many different saw brands. The one I always come back too, is a Bacho 244-22. In my opinion it gives a really nice clean cut, the weight and balance is perfect, and they are not overpriced.

You can easily pay double for a saw that is nowhere near as good. This is one of the main reasons it is so popular with professional carpenters, who go through a lot of saws. Walk on any building site and you will see tradesmen using these.

You can see this saw and read some customer reviews by clicking here

Best power tools for cutting sheets of MDF

The power tool you choose, will depend on the cut you want to make. If you are cutting a straight line, then any type of circular saw will do the job.

Unless you are a professional, who will be using this saw day-in day-out, then a decent budget circular saw will do the job.

I personally bought a budget saw a few months ago for cutting plywood and I was very happy. Especially considering it cost half the price of the more professional saws.

You can read my full Mac Allister circular saw review by clicking here

If on the other hand, you want to cut a curved line, a scribe, or any other non-straight line, then a jigsaw will be your best bet. Again, any decent jigsaw will do the job, and if you’re only using it for DIY, I would recommend buying a basic 240v corded jigsaw.

Best saw for cutting MDF skirting and architrave

Two very common MDF products are skirting and architrave. These products both come in MDF and in standard timber. However, MDF is popular, as it has certain advantages over timber. These include:

  • No knots, sap, and grain
  • MDF doesn’t warp, or twist
  • Easy to paint
  • Easier to fill and hide mistakes.

When cutting MDF skirting and architrave, the most common tool used is a chop saw. This will allow you to cut perfect mitres, which will result in a very neat finish.

If you don’t have a chop saw, you can cut by hand with a mitre saw, or a mitre block, but this will take more time and there is more room for error.

Another saw you will need when cutting skirting is a coping saw. This will enable you to cut scribes on internal corners.

When it comes to hand tools like coping saws, I don’t recommend going as cheap as possible. A reasonably good saw will last for years. So spending a few extra pounds makes sense.

I have the same coping saw that I bought as an apprentice back in 2002. So that’s lasted me 2 decades, and it has had a lot of use in that time.

You can see a decent coping saw by clicking here

Best saws for different types of cuts in MDF

I could go on and mention lots of different types of MDF, and how they are all cut. However, I don’t think that is necessary, or particularly helpful.

We have already covered the main saws you would use for cutting any type of MDF, in the previous two examples.

The more important question to ask, is the type of cut you are performing. Therefore, below I have mentioned the type of cut and the best saw for the job, followed by potential alternatives.

  • Long straight cuts (rips) – The best saw for this type of cut, is a circular saw. It’s by far the fastest, and if you use a guide, the cuts should be perfect.

    The alternative here is cutting by hand. This will require more skill and you should be able to cut in a straight line. Also, cutting a full length of 18mm MDF is no joke. Prepared to be out of breath and have a sore arm by the end.

  • Long uneven cuts – This could include times when your MDF is butting up to an uneven surface. In this case, you want to try and cut the wood, so it buts up with no gaps.

    For this type of job, you need a jigsaw. If you mark the scribe correctly, a jigsaw will let you cut exactly to the shape of the surface.

  • Short straight cuts – For this job, either a chop saw, or a hand saw will do the job. Personally, I use the saw that is the most convenient at the time. If you aren’t great at cutting straight, then a chop saw would be the best choice.

  • Cutting mitres – This will be needed for anything similar to skirting or architrave, where MDF needs joining on an angle or a corner. The best saw for this job would be a chop saw.

    If you don’t have a chop saw, a mitre block or a mitre saw will also do a decent job.

  • Small, neat scribes – This is most common with things like skirting, but it could apply to other situations, where the material being cut is delicate. This would mean a jigsaw is too aggressive, and a coping saw would be the best choice.

Conclusion

As you can see, there is no single best saw for cutting MDF. The tool you choose, needs to be the right tool for the job.

In many cases, you will have a choice between a hand tool and a power tool. Again, the best choice will depend on the job. In many cases the power tool is the best and easiest option. However, when doing more intricate and delicate work, you can usually get more finesse with a decent hand tool.

Filed Under: Engineered wood

Is chipboard waterproof – Can it get wet?

November 12, 2022 by Carl Lewis

Chipboard is an engineered sheet material. It is made from wood chippings and adhesives. These are compressed under great pressure, to form strong robust sheets. Due to its strength and relatively low cost, it is used in a variety of different products. Such as:

  • Chipboard flooring
  • Furniture
  • Kitchen cabinets
  • Kitchen worktops (these use high-density chipboard).
  • Etc.

Another advantage, is the way it is made. Chipboard is a sustainable product, with up to 80% of the wood chippings coming from recycled material.

is chipboard waterproof

Despite its popularity, chipboard is not waterproof. Excess moisture causes the material to swell and eventually deteriorate. The sheet doesn’t even need to be in direct contact with water. Even prolonged high levels of humidity can destroy chipboard over time.

Due to this, you shouldn’t use chipboard in areas of high humidity. Or any area where the wood will come in contact with water.

The main examples in the home, are places like the bathroom and the kitchen. Both of these areas produce high levels of moisture. Therefore, standard chipboard will be at a greater risk of deterioration.

The caveat to this, is laminated furniture. This includes kitchen and bathroom units. Obviously these items can last for years, and this is because the chipboard is protected by its laminated covering.

However, anyone that has had a major leak in a kitchen cabinet, will know the laminate won’t save your units. Even with a laminate coating, water will still get in and destroy the chipboard.

For this reason you should always fix leaks as soon as you find them.

How good is water resistant chipboard

You can purchase a water-resistant version of chipboard. This is made using different types of adhesives, which make it more protected against humidity.

These adhesives reduce the amount of water absorbed by the chipboard. Also, due to a stronger glue bond, there is less expansion and swelling in the boards.

This means that a moisture resistant chipboard is much more suitable for areas where there are higher levels of humidity.

With that said, it is important to point out, there is a big difference between water resistant and waterproof. A water-resistant chipboard is definitely not waterproof. If it is exposed, or even submerged in water for a length of time, it will suffer the same fate as a standard chipboard.

It can withstand water vapour in the air, and occasional splashes, but it is certainly not designed to be constantly wet. This also means it is not designed for outdoor use. Rain would destroy moisture resistant chipboard over time.

If they were used outdoors, there is only one difference between a standard board and a moisture board. Basically, the standard board would just deteriorate much quicker. Neither are waterproof! Therefore, if you have an outdoor project there are much more appropriate engineered woods, such as specially made plywood’s and OSB.

What to do if chipboard gets wet

If chipboard gets wet, it is advised to dry it out as soon as possible. This will avoid prolonged exposure and the risk of moisture soaking in. For flooring, this will mean mopping up any excess water and drying the area thoroughly.

If there has been a leak, or any other significant exposure to water, using a heater and a dehumidifier can help to dry any moisture trapped in the boards. The use of a dehumidifier will remove moisture that evaporates from the chipboard.

For any area of the floor that is swollen or damaged beyond repair, this will need removing and replacing. This is especially true for standard chipboard, as it is extremely porous and will continue to soak up water.

Even with a moisture resistant board, you should still replace it, if the board has noticeable signs of damage.

Once the board has begun to swell, its structural integrity as compromised dramatically. Often, once the board has begun to swell badly, it can easily be broken with your fingers. Obviously, you don’t want to be standing on this type of damaged surface.

For any water damaged furniture, that is made from chipboard, you can move this to an area where it can be dried. Once dry, you may be able to sand down any swollen chipboard. Also if it has soaked in, but not all the way through, you could chisel away any of the damaged chipboard and use a wood filler to repair any holes. Then once this is done you can sand to a flat surface.

Whether it is furniture or flooring, the most important thing, is to resolve the cause of water damage. If the problem persists, and the chipboard keeps getting wet, it will get to a point where it is no longer repairable.

Conclusion

Chipboard is a strong, durable, affordable, and sustainable product. However, chipboard is not waterproof. Therefore, it is not advised in areas where there is a high risk of coming in contact with water.

If this is the case, there are plenty of other engineered woods, such as Plywood, that are much more suitable for the job.

If you do intend to use chipboard in an area of high humidity, make sure you opt for a moisture resistant board. Whilst this is not waterproof, it will give much more protection than a standard chipboard.

Filed Under: Engineered wood

Can chipboard be planed? Whats the best tool for the job?

November 9, 2022 by Carl Lewis

Chipboard, also known as particle board, is a sheet material that is made by combining chips of wood with adhesives. Because of the way it is made, it is not the best material to plane.

With that said you can plane standard chipboard with a sharp smoothing plane or even a block plane. However, there are a couple of issues you may face:

can chipboard be planed
  1. There is a chance that the chipboard could spelch out and chip if planed too aggressively. To combat this, you can score the line you are planing too. This can be done with a sharp Stanley knife.

  2. The second problem, is it can be pretty rough on your tools. Chipboard has adhesive, which runs throughout the board. This stuff sets really hard and will blunt your planer pretty quickly.

Due to the first point, you should only plane a small amount on each pass with your plane (0.5-1mm). However, this increases the problem from the second point, as you will be using your plane on the chipboard more.

Another option, is to use an electric plane, but you will still face similar issues. Ideally, if you are using this method, you should really reduce the depth right down to avoid the board chipping. Also, ensure the plane is running before it comes in contact with the wood.

If the chipboard is melamine faced, or some other kind of laminate, this makes planing even more difficult. This is usually a tough material, and it will also blunt your blades.

In this case, if you’re just trying to plane a couple of millimeter, you may want to try sanding it instead. This can be done with a belt sander. Although this could round the edges, and it would be harder to achieve a perfectly straight, flat edge.

Trying to plane over 5mm from chipboard? Stop!

If you need to remove more than 5mm, then a plane is not your best option. For this, and anything bigger, you would be best using a saw. If the line is straight, then a standard hand saw will do the job.

Bear in mind, that if your chipboard has any kind of laminate on it, this will probably blunt your saw a little.

If it is just a standard chipboard you have nothing to worry about. The adhesives will blunt your saw very slightly, but it certainly wont ruin a saw cutting one or two pieces of wood.

If there is a facing on the chipboard, try to saw down into the wood and draw the saw back up more gently. This swill avoid spelching the surface up.

Another option, is to use a circular saw with a guard rail set up. This will give you a perfectly straight cut. Also, it shouldn’t really spelch the chipboard, especially if your saw has a sharp blade.

For laminated chipboard of any kind, you can score with a knife, prior to cutting. You can also place masking tape over the cut line, to further protect and avoid the face chipping away.

It is quite common for kitchen worktops to be made from a high-density chipboard, covered in a laminate. It is also very common, to cut these with both hand saws and circular saws.

Also, if you do need to cut lines that aren’t straight, a jigsaw would be a good choice. This could be used if you were cutting a scribe or a curve of some kind.

A jigsaw will cut through standard chipboard easily. However if it has some kind of laminate such as melamine, make sure you use a downward cutting blade. This will minimise splintering and chipping the surface.

Conclusion

Chipboard isn’t the nicest material to plane, but it certainly can be done. With that said to achieve the best results with minimal damage to the chipboard, you will need a very sharp blade. You should also have a shallow blade depth, so you avoid chewing up the wood.

For surfaced chipboard, such as melamine and other laminates, it can be more challenging. You can consider planing a small amount and finish the edge by sanding.

For any adjustments over 5mm, you would usually be better using some kind of saw. This could be a standard hand saw. Or even a power tool, such as a circular saw or a jigsaw.

Filed Under: Engineered wood

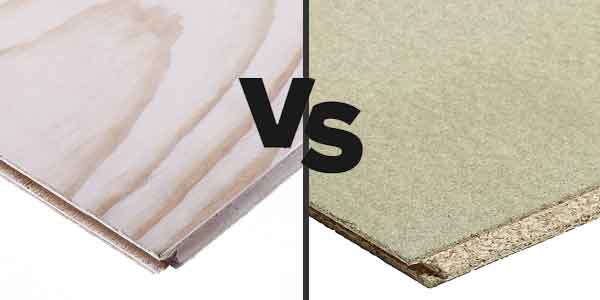
Replacing chipboard flooring with plywood – Pros & Cons

November 2, 2022 by Carl Lewis

In this article we will be looking at replacing chipboard flooring with plywood. Including why you might want to do this, pros and cons, and the different options available.

Chipboard flooring is one of the most common types of floorboards used in modern properties. It usually comes in sheets of 600 x 2400mm, and the thickness of these sheets is generally 18 – 22mm thick.

replacing chipboard flooring with plywood

Chipboard is popular for several reasons, but mainly because it is low cost, and easy to fit. It can also be purchased as a standard chipboard or a water-resistant variety.

With that said, it is not without its problems. Some of the main issues can be seen below:

  • When nailed, chipboard flooring can creak quite badly.
  • If standard chipboard gets wet, it deteriorates.
  • Water resistant chipboard is just splash proof. It’s not waterproof, so eventually it will also deteriorate.
  • Once fitted, chipboard flooring can be difficult to remove, or access below.
  • It can’t be used as a finished floor, as it is not aesthetically pleasing.

If you are replacing chipboard flooring, one of your options is plywood. Plywood is also a manufactured sheet wood. However, it is generally more robust and durable. This is due to the way it is manufactured.

Chipboard, also known as particle board, is made by combining glues and resins, with wood flakes and chippings. Once the wood chippings are completely coated in the resin, it is compressed into sheets.

In comparison, plywood is made from thin sheets of wood. These are glued together and pressed at high temperatures, to form a strong solid sheet material.

Pros of replacing chipboard flooring with ply

As we have already mentioned, the production of each material is different. Therefore, the finished product has different characteristics. In this section, we will be looking at the main advantages of replacing chipboard with plywood.

  • It is a stronger product – Over time plywood is likely to last longer than chipboard.

  • It is more water resistant – Due to its structure, it will take longer to deteriorate when in contact with moisture. A standard interior plywood will hold up much better than a standard chipboard.

    The same is true for water resistant versions. You can buy exterior plywood that is very water resistant and suitable for outdoor use. Marine plywood can even be boiled for 72+ hours before it begins to deteriorate.

    On the other hand, water resistant chipboard is nowhere near as resistant to moisture and should never be used outside.

  • Plywood creaks less underfoot – Whilst both products can creak if they are nailed, in my experience chipboard is worse. Obviously, the solution to either boards creaking, is to screw them rather than nailing them. Nailing is more common because it is often cheaper and easier. Also, the job can be done extremely quickly if you are using a first fix nail gun

  • Wider variety – Plywood comes in more sizes and thicknesses, as well as several more different varieties. Lower end interior plywood flooring (softwood) is only slightly more expensive than standard chipboard.

    Hardwood and tropical plywood are higher quality, and both are more water-resistant.

    Then you also have things like marine plywood, and decorative faced plywood, which are far better quality, with the latter being suitable for finished flooring.

Cons of replacing chipboard with Plywood

  • More expensive – In pretty much all cases, it is more expensive. This is the main reason chipboard is more common, it is simply a more affordable product. This is particularly true, when compared with any higher quality plywood.

  • T&G plywood flooring is less readily available – Go to any builder’s yard, timber merchant, or big DIY chain and most will stock tongue and groove chipboard flooring. It is far less likely you will find tongue and groove plywood.

    You can obviously lay standard plywood. However, this will likely require more cutting (more work). Also, because there is no tongue and groove, you will need to add noggins under all unsupported edges (more work again). This is required, otherwise you could end up with steps between boards.

These are the main issues. Its simply just more expensive, and harder to get hold of.

Conclusion

To conclude, it is completely acceptable to replace chipboard flooring with plywood. Whether it is the best choice, will depend on the individual circumstances you are facing.

If this is your own home, then plywood is certainly a better product, so for a slightly higher price, you will definitely get a better-quality sub floor. You may just need to shop around to get the best price, and you may need to order your tongue and groove plywood online.

Filed Under: Engineered wood, Floorboards

  • Page 1
  • Page 2
  • Go to Next Page »

Primary Sidebar

Copyright © 2025 · WordPress · Log in