There are several reasons you may need to fix a batten to a wall. One of the most common is to screw plasterboard over a solid wall.
There are also times when you may want to fix a batten to an existing wall. This could be to install bedroom or kitchen units. Or in order to fix something else, such as a curtain rail or a shelf.
In this article, we will look at the main method of fixing a batten to a wall for plasterboard. As well as how you can fit individual battens to different surfaces.
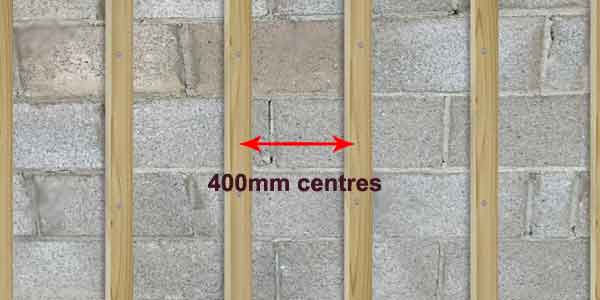
Fixing timber battens for plasterboard
This process involves drilling through the timber batten into the masonry and fixing with plugs and screws.
Generally, a 7mm masonry bit will be used, and the batten will be fixed with brown plastic wall plugs. This will be combined with a suitable length screw for the specific job.
The length of screw you choose will depend on several factors, including the thickness of the batten and whether any packing is needed. Your goal should be to get between 1.5 – 2 inch of fixing in the masonry wall. Generally 65mm – 100mm (2 ½ – 4 inch) long screw will be required.
The diameter of this screw will need to be 5mm (no 10) for brown plugs. So when you buy these screws, you would be asking for something like 2 ½, 3, or 4 inch 10’s.
You can also fix with red plugs. However, you will need a 6mm drill bit, and the screws should be 8’s rather than 10’s.
The process is relatively simple, especially if you have a flat and reasonably plumb wall. If this is the case, then battens can be added without much need for packing.
To drill the holes, you will need a drill that is capable of drilling into brick. You could use a cordless drill/driver with hammer action. Although an SDS drill would be better, especially when you are battening large areas, as drilling will drain your cordless battery.
You can buy a decent corded SDS for under £100 and this will make the job much easier.
You can see an example of a popular 240v SDS from DeWalt by clicking here.
NOTE: this is 240v, so it is designed for home use. If you intend to take it on to a building site, you will need to buy a 110v version.
Fixing battens to an uneven wall
The above explanation assumes that the wall is plumb and flat. However, this is not always the case. You may encounter a wall that is out of plumb or uneven. This could be due to poor workmanship and bellies in the wall. Or it could be due to a more bumpy, uneven surface like stone.
Whatever the reason, you will need to pack your battens out, in order to achieve a flat and plumb surface.
To do this, you will first need to identify where the battens will be placed. Then, find the area that is protruding the furthest and work from that point. Here you can fix directly to the wall, and then you will need to pack other areas to make your battens plumb.
When fixing you should make sure all the timber battens are vertically plumb. Plus, you should also continually check horizontally with a straight edge (6ft level) to ensure the battens create a flat surface.
Fixing individual battens to different surfaces
There are other scenarios where you may need to fix battens to existing finished surfaces. This can be for a whole variety of reason. However, it is usually done in order to fix something else to the wall.
The way this is done will depend on the type of wall you are fitting too. Below are a few examples of different walls and how you could attach a batten too them:
- Fixing to a solid rendered/plastered wall – In this scenario you would use the same method as before. Because the wall is solid, this will require drilling and fixing with plugs and screws. You can also add additional strength with a good grab adhesive such as no more nails.
- Fixing to a stud wall (or timber battens) – This is usually pretty easy,and due to the wall containing timber, you should be able to screw directly into the wood. Pre-drilling and even countersinking the screws, can create a better finish and avoid your batten splitting.
If you have a 2nd fix nail gun, this is also an option, providing the batten isn’t taking a huge amount of weight. Both screws and nail gun brads should be used in combination with a grab adhesive for a stronger fixing. - Fixing battens to a dot and dab wall – This is a little more complicated. In order to get a good fixing with screws, there are a variety of different plasterboard fixings that will do the job. Used in combination with a grab adhesive you should be able to get a strong and solid fixing.
Also, a 2nd fix nail gun can be a good option again, especially if your batten is only supporting something light weight. Again, combining this with a decent grab adhesive will make the fixing much stronger.
Conclusion
Fixing a batten to a wall is a relatively simple job. When you are creating a frame for plasterboard your main concern should be achieving a flat and plumb surface. This can be a little more complicated if you need to do a lot of packing.
When it comes to fixing individual battens on finished walls, the process is also pretty simple. Using a grab adhesive is always recommended, as a secondary fixing. The mechanical fixing you use, will be determined by the surface you fix too.


