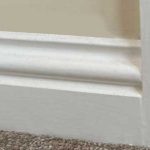
Whether your renovating, redecorating, or replacing door casings, at some point you may need to remove architrave. This is a relatively simple job. However, it does come with the small risk of damaging the surrounding plaster.
If your goal is to remove the architrave without damaging the plaster, you will need to take several steps for the best possible result.
Tools you will need for this job include:
- Stanley knife
- Hammer
- Chisel
- Small flat crowbar
Below you can see the steps required to remove the architrave.
Also if you want to know the tools needed to remove skirting boards click here
Step 1 – Cutting around your architrave
The first thing you should do, is score around the architrave with your Stanley knife. Doing this on the outside edge will cut through any decorator’s caulk or paint. This will ensure you don’t pull any wallpaper or plaster off the wall when the architrave is pulled away.
You can also do this on the inside edge, just to cut through any paint or caulk. There is much less potential for damage here. However, it will create a nice straight cut in the existing paintwork and caulk. This will avoid paint peeling off the woodwork.
Step 2 – Gently start to remove the architrave
Once you are happy the architrave has been separated from surrounding surfaces with the Stanley knife, you are ready to start removing it.
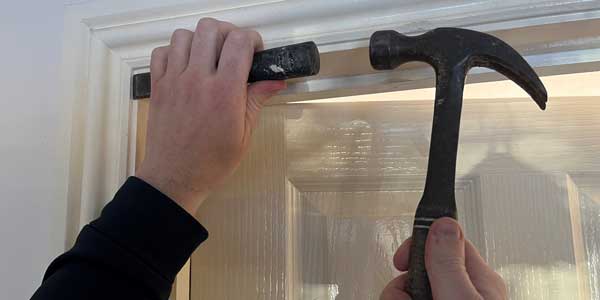
The key to avoiding damage to plaster, is to create a small gap, before we start pulling at the architrave. To do this, you need to create a small gap with your hammer and chisel. This can be done from the outside in the top corner. However, I personally prefer to do this on the inside edge.
Take your chisel and place it with the flat edge facing down. This should sit on the edge of the casing, where the architrave meets the door frame, and gently hit with the hammer. This will cause the architrave to lift as the bevel of the chisel slides under.
Step 3 – use the flat crowbar as a second lever
Once there is a small gap between the architrave and casing, you can use the crowbar to assist with lifting the architrave. Move down the length of the architrave with the chisel and the crowbar, removing the architrave a little bit at a time. This will avoid damage and will also avoid snapping the architrave.
If you take your time and follow these steps, the removal should be quite easy, and there should be zero damage to the surrounding plaster.
The architrave itself will only be fixed with small pins, so there shouldn’t be a huge amount of resistance. This mean you can use less force and avoid damaging the frame or surrounding plaster with your chisel and crowbar.
Follow the same process on the two remaining pieces of architrave, to fully remove it.
Conclusion
Removing architrave without damaging plaster is actually really easy. Its just a case of taking your time, and a few precautions. By getting the architrave going before you start using a larger tool such as a crowbar, there is much less risk of causing damage.
The most common cause of damaged plaster, is using a crowbar or hammer to lever the outside edge of the architrave. This applies pressure to the plaster, which is almost guaranteed to cause damage, especially without a small gap created with the chisel.
The second most common way to damage plaster, is pulling it away with the wallpaper. This is easily avoided by taking the time to cut around the edge with a Stanley knife.
If you just take your time and follow these steps, you should completely avoid any damage to the surrounding plaster or woodwork.