In the video below, you can watch the entire construction process of a garden room roof:
Next video >> Learn how to install facia and soffit to you roof. Watch Now!
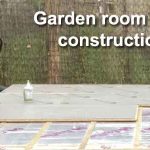
Once you have constructed the walls for your garden room, the next job is to create the flat roof. This is a relatively simple process. Providing your walls are built correctly, it is really just a case of cutting the timbers, spacing them evenly and fixing them securely.
Another thing you will need to consider with garden room roof construction, is the finished height. The reason for this, is permitted development, which allows a max height to the top of the eaves of 2.5m. Obviously, this is something that should also be considered when creating the base, floor, and walls of your build.
The final consideration, is spacing for insulation between the joists, your roof materials and internal plasterboard. All of these will determine the spacing of your joists. The main goals here, are to reduce material waste and provide a solid roof.
Step by step garden room roof construction
The video above gives a great visual guide to the roof construction process. However, you can also find a written summary below if you would prefer to read about it. A good idea is to print out the written version as a guide and view the video for any areas where you need a visual reference.
Marking out your Joists
Before you start to add a single joist, it is crucial that you mark out their positions on the front and back wall plate. The wall plate is the top of the stud walls at the front and back.
The most common spacing for roof joists is 400mm. The first reason for this is building regulations, this determines spacing and joist size. You can see an example of a joist span guide in this article.
The second reason for this spacing, is fitting materials too, and between the joists. For example, a standard 1200mm x 2400mm plasterboard should fit to your joists without the need for cutting.
To get started, you will mark your first joist. This joist will run tight up to the inside edge of the left-hand stud wall.
Next from the edge of the side wall, 400mm should be the centre of your next joist. However, instead of marking at 400mm, this mark should be made at 375mm. The reason for this, is we want the centre of the stud at 400mm. Therefore, 375mm will be the left edge of the joist. Add a cross to the right of this mark so you know which side of the line your joist sits.
Following this, every other mark is 400mm, measured from the line of the previous joist. If this is done correctly, the 4th joist should be 1200mm to the centre of the joist, when measured from the side wall.
By doing this, you should have joists that are spaced perfectly for fitting your internal plasterboard. It will also reduce waste from the OSB applied on top, and the insulation between them.
Finally, these marks should be transferred identically to the opposite side.
Cutting and placing your joists
Once you are happy that your wall plates are marked correctly, you can begin to cut and add the joists. The length will be based on the amount of overhang you would like on the front and back of your roof.
This can come down to personal preference. However, it can help to determine this length based on the type of soffit you intend to use. For example, in the video, I knew I was using a 300mm soffit on the front of my garden room. As a result, I left 250mm of overhang. This was increased to 300mm when I added the front timber to trim the ends of the joists.
Again, this avoided future waste, and meant I didn’t need to rip the front soffit down, when it was applied at a later date.
Once you decide on the length, you can cut all of your joists in one go and lift them into place sitting them on their wall plate marks.
At this point you can fix the joists at each end, ensuring that the overhang is the same on each joist. I personally fixed the joists with nails by spiking a nail either side through the joist, down into the wall plate. Following this, I secured them further by screwing from underneath to give a stronger fixing.
Using a string line to align your roof joists
The two joists fixed either side can now act as a guide for all your other joists. To do this you will need a string line, which should be run between the two joists on either side of your roof.
The string should be pulled tight and will create a straight line that you can bring all of the other joists too.
Simply move each joist up to the string line and fix them in place. When doing this, make sure you don’t push the string line out, carefully move the joist up so they are barely touching the string, ensuring that it remains in place and continues to provide a straight guideline.
Again, every joist should be fitted securely. Ideally this should be done with screws as they will give a much stronger fixing and remove the need for joist hangers, or truss clips.
Trimming the ends of your roof joists
At this point, you should have sturdy well fitted roof joists on your garden room. The next job is to trim the front and back, as well as adding two additional joists. These will create an overhang to the side of your room.
In the video above, I created a side overhang that was similar to the overhang at the back (roughly 150mm).
To do this, simply cut two longer joists that span the front of all the existing joists and are 300mm wider than the entire building width. This can then be fixed in place to create your 150mm overhang either side. Simply fix these to the front and back of your existing joists. This should be done with 2 screws through the end of each joist.
Then add two more joists between either end, to span front to back and create your overhang.
Laddering your side overhang
Once your joists are added to the sides, you should be left with a roof that overhangs on all sides. However, your side joists will need securing in place. Currently they will be floating, with only two screws either end. This will need strengthening.
Doing this is very simple and we just need to ladder the two end joists. To do this, we will add noggins between the overhang joist and the first internal joist. Simply cut 5-6 noggins that fit between these joist and add two fixings either side.
The noggins will be sat on top of the side wall plates. This means that any load in the overhang joist, is transferred into the walls and fully secured to the rest of the roof.
Adding OSB
The final step to finishing your garden room roof construction, is covering with OSB. This can be done with standard square edge OSB, or tongue and groove sheets. If you do use square edge boards (like I did), you must ensure that all joints land on a timber. This may require the occasional cut. You should also add noggins between the roof joists to add stability and provide an edge for boards to land on.
When fitting your OSB, you should use screws as this will provide a far superior fixing to nails.
Conclusion
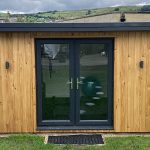
So there you have it, hopefully this guide on garden room roof construction has been helpful. If you follow the written instructions and the video, you should be able to produce a strong and sturdy roof on your garden room.
The key to doing a good job here, is taking your time, and ensuring that you measure and mark everything out correctly. If you get this part right, then any decent DIY’er should be able to do this job without many problems.
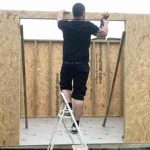
One last point: This is a job where you will occasionally be working at height. Therefore, safety precautions should be taken, and where possible, you should try to get some help, as opposed to doing the work alone.
Having someone to help lift and hold timber in place, will make life much easier and avoid any mistakes or accidents.
And on that note, I hope you enjoyed this guide and good luck building your own garden room roof.