Re-plastering is a great option for hiding old surfaces. You can quickly create a new, smooth finish that is suitable for painting and decorating. However, for plaster to bond correctly, the sub surface must be in reasonably good condition.
You will need to prepare the surface correctly before work begins. The surface will need to be checked for any imperfections or problems. Blown plaster is a common problem you may come across.
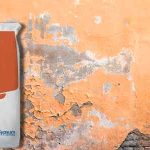
If you are plastering over existing plaster, it is common to find issues with the existing surface. For example, loose plaster coming away from the wall. This means that the plaster has blown, and you should not plaster over it.
Blown plaster no longer has a bond with the subsurface. So, if you choose to plaster over it, the new plaster will almost definitely come away from the wall or ceiling.
Can you skim over old plaster?

Old walls can become worn and tired looking, so an easy option is to plaster over them. This is quite normal practice. However, there are some things you must think about beforehand.
For new and old plaster to bond, the subsurface must be solid. It will need to be free of cracks and imperfections. Any blown plaster should be removed completely. Old plaster that has Blown will be weakened, which means that the new plaster won’t hold.
When you skim on top of old plaster, it needs to have a solid bond to the surface beneath. This will enable the new plaster to form a strong bond without the risk of failing. Where plaster is loose or blown, you should spend time removing it.
By removing the old blown plaster, you will save yourself time in the long run. If you don’t and apply new plaster on top of it, you will soon find yourself needing to remove both the old and new plaster.
How to prep old plaster?
If the plaster is suitable for skimming over, you will need to carry out prep work to achieve a perfect finish.
You need to prime the surface and make sure that it has a suitable key. To provide a good key you can use dilute PVA. Using a roller, you can apply water PVA at a mix of 5:1, to the surface that will be re-skimmed. You will need to leave the first coat of PVA to dry completely before you apply the second coat.
You can apply the second coat in the same way, although it is usually a thicker mix, at a ratio of 3:1. Once you have applied this coat, you have two options. You can opt to allow it to go tacky before you apply your skim coat, or you can let it dry completely.
The option you choose is down to your ability as a plasterer. Skimming plaster over tacky PVA might prove slightly challenging for first-time plasterers, so it helps to let it dry completely. If you have more experience, you can begin to apply the plaster when it is tacky.
Why does plaster blow and how to stop it?
If you have noticed blown plaster, it can help to understand what caused it. Blown plaster will often result in the plaster coming away from the walls completely. Therefore, if you want to avoid this happening in the future, you should understand what causes it.
Essentially, blown plaster has lost its adhesion with the surface below, this can be caused by several factors, including:
- The surface is porous, which means that the moisture is sucked from the plaster. This prevents the plaster from making a strong bond with the surface.
To fix this, you should ensure that you PVA the surface prior to plastering. This will seal the surface and prevent moisture from being sucked out of the plaster.
- Damp behind the plaster can also cause it to blow. This is because the additional moisture disrupts the chemical reaction, which stops the plaster from setting or bonding.
To stop the problem, you will need to identify the source of the damp and fix it. It is then important to let the surface dry out before re-plastering.
- If the surface is smooth and has not been primed using PVA or another bonding agent, then the plaster might have problems bonding.
To prevent this from happening, it is important that you prepare the walls using the correct bonding agent. This will ensure that plaster can adhere to the subsurface.
Conclusion
When plastering over old plaster, it’s vital that you make sure that the surface is in good condition. If the condition is good, then you will need to prepare the walls in readiness for the new plaster.
Should you find any blown plaster, you will need to remove it completely, back to an area where it still has a good bond to the surface below. This will allow you to apply the new plaster to a solid surface, ensuring it bonds correctly.


