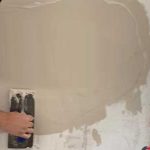
Whether you’re plastering a new wall in your home or re-skimming an existing surface, plastering is a real skill, so getting a good finish can be difficult without some experience.
If you want perfectly smooth walls that are easy to paint, you’ll want your plaster looking its best after skimming.
However, applying plaster to walls requires the right technique. If you don’t get it right, then you may find your plaster doesn’t have the best finish. One common problem is bubbles in your finished skim coat. But how do these bubbles form?
There are several reasons you might have bubbles in your plaster. However, it is usually a sign that you are over-aerating the mix. This can happen when mixing too quickly. Instead, you should aim to mix your plaster at a low to moderate speed.
The mixing technique can also cause bubbles, by introducing more air into the mix. It is quite common for inexperienced plasterers to mix up and down, instead of in a circular motion.
Another common issue is the mix could be too thick. This can trap air and make it harder to remove when applying the plaster. Along with this, skimming at the wrong angle and speed could also cause your plaster to bubble.
How Do I Stop My Plaster From Bubbling?
If air in the mix is the cause of the problem, then your mixing technique might need to change. It’s common for people to mix plaster by lifting the paddle mixer in and out of the mix during mixing.
By lifting it in and out of the plaster, it enables air to enter the mix, and this can cause the plaster to bubble. The correct way is to use a circular motion, while leaving the paddle in the plaster while stirring. This reduces the amount of air in the mix and will create a smoother mixture.
Furthermore, the mix should be the right consistency. If it is too thick, this can cause air to get trapped. If you add too much water, this can also cause bubbling, so you should ensure your mix is the correct consistency.
It’s possible that you might also be over-trowelling. This means that when you apply the first coat, you spend too much time trowelling it. This is natural, as you’ll want to achieve a perfectly smooth finish, but it is not necessary.
You should apply the first coat and leave it alone until it stiffens. Too often, people go back to the first coat too soon. So, apply the first coat as quickly as possible and work it flat. One general rule of thumb is to cover around 4sq/m at a time. Once the wall has been covered, you should leave it alone.
Then, when you apply the second coat, keep the mix thin. If bubbling is still a problem, make sure the plaster is flat and almost set, before using a heavy trowel action with a small amount of water. This should then prevent bubbling from occurring.
How Do You Repair Blisters in Plaster Walls?
When you see bubbles while plastering, you might feel tempted to pop them or go over them with a trowel immediately. However, the aim is to deal with them at the right time.
If you notice bubbles while applying the first coat, you should ignore them until the time is right, as you can make them worse. They can then be held back by allowing the plaster to set a little more.
Should you apply the second coat too soon, then the blisters will come through. So, it’s important to leave the 1st coat until it is almost set before you move onto the 2nd coat. This should make it possible to deal with them as this is the flattening stage.
If you notice blisters in the second coat, you should leave them and continue with the trowelling. You should focus on filling hollows and trowel marks. At this point, you might notice that the blisters improve.
If they don’t improve, then you should wait for it to firm up before running your trowel over the plaster and the blisters. This will mean that the plaster is still workable, which will enable you to smooth over the popped blisters.
If your wall is completely dry and you still see small imperfections, you should give it a mist coat 50/50 water and emulsion. This will be needed prior to painting anyway. However, it will also highlight these small imperfections. At this point you can use a fine grit sandpaper (120-180) and some fine filler. This should eliminate any issues and give a high-quality decorated finish.
Conclusion
There are several reasons why plaster will blister and bubble. So, you should make sure your plaster is mixed correctly, also use a good trowel technique and don’t overwork your first coat.
If bubbles or blisters appear, don’t rush into dealing with them. Take your time and wait for the plaster to start going off before removing them. However, getting this right will require a certain level of skill, as well as good timing.