Hanging a door is a relatively easy job once you have a little experience doing it.
One thing that will make it easier, is ensuring you have all the correct tools for the job. In this article we will be discussing what tools are needed, as well as more detail on how each one is used.
If this is a DIY project and you have never hung a door before, just remember to take your time. You will probably find that it takes you a little longer. However, if you ensure you are using the correct tools and taking your time, it’s much more likely you will do a good job.

Below is a list of tools you will need, and we will go into more detail in the next section:
- A sharp pencil
- Tape measure
- A decent hammer
- Some good chisels
- Smoothing plane
- Electric plane
- Combination square
- A decent cordless drill
- And some decent wood bits (spade bits, or I personally like auger bits)
What is each tool used for when hanging a door?
Nearly every tool mentioned above is essential. You could possibly get away with losing 2 of these, but it would definitely make your job harder. These would be your electric plane and your wood bits.
In theory, you could plane the entire door with your smoothing plane. However, depending on the amount that needs planing, this could be a lot more work. Your electric plane will speed this process up dramatically.
Also, you could manually chisel out your locks, latches and keeps. But again, this would be much more work and would require a certain level of skill. Also wood chisels are not the best tool for the job. They will do it, but you would have a much easier time with some mortice chisels.
Below you can see what each tool is used for in more detail:
A sharp pencil
This is essential and I want to put an emphasis on the word “sharp”. Your pencil will be used to mark every part of your door. Including hinges, latches, keeps, handles, face plates, and any areas that need planing off to make your door fit.
To ensure your door and ironmongery are neat and everything fits perfect, your lines should be very thin and accurate. Therefore you need to keep your pencil sharp. A blunt pencil is much more likely to result in gaps around your face plates and hinges.
Tape measure
This will be used for several jobs, such as marking handle heights and marking the hinges. Your hinges will need marking the correct distance from the top, bottom, and middle of the door.
Hammer and chisels
I put these two together, as most of the time you will be using them together. You will be using both during several parts of the process. This will include:
- Chopping out hinges
- Cutting out face-plates and keeps
- Cleaning out your latch hole after drilling
Your chisels should be sharp (finger losing sharp). Just like a sharp pencil a sharp chisel is essential. This will ensure that you cut out your perfect sharp pencil lines neatly.
If you are using either blunt chisels, or a blunt pencil you will have problems. If they are both blunt, then you are in big trouble and its probably going to be a rough job.
Just take the time to sharpen your chisels on a fairly regular basis. It also won’t hurt to quickly run them over a sharpening stone for a few minutes before you hang your door.
Smoothing plane and electric plane
As I mentioned previously, an electric plane is not 100% essential, but it will make your life one heck of a lot easier. Generally, you will take the bulk off with your electric plane and then fit the door with your smoothing plane.
A good example of how this would work, is a door with a slight belly. Let’s assume, you need 4mm off at the top and bottom, but this reduces to 2mm in the middle.
In this example, you would take of 2mm with your electric plane across the length of the door. Following this you would be planing from 2mm to nothing from either end into the middle.
You could potentially take some more small amounts off, nearer the ends with the electric plane set at 0.5mm. This would reduce the amount of hand planing required. Then you can finish the door off, and even it out with your smoothing plane.
Finally you may need to take off a leading edge. This will stop the leading edge of your door from catching on the door casing.
When planing, you must ensure your smoothing plane blade is very sharp (are you noticing a theme here). If your plane is blunt, it can chew up the wood and create a low-quality finish.
Combination square
This is a handy little tool, and you will use it for several jobs when marking your door up. Such as marking your hinge depth and squaring around for your door handles. This will ensure everything lines up.
Just like a lot of other regular tools such as hammer, or tape measure. I always have a square close by for a variety of little jobs.
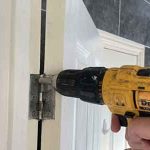
Cordless drill and wood bits
You will use your cordless drill to cut out locks and latches with your wood bits. You will also use the drill to screw hinges, face-plates, keeps, and hang your door into the casing.
Conclusion
This article contained all the tools you will need to hang a door. Providing all your tools are nice and sharp, and you follow the correct process to hang your door, you should be able to complete a nice, neat job.