If you’re planning on fitting a kitchen, you will need a variety of tools to complete the job. In this article, we will be looking at the tools needed for kitchen fitting, as well as how they are used during the installation process.
Below you can see a full list of tools you will need, followed by when and how they will be used:

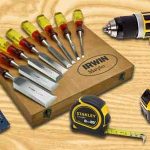
Hand tools
- Set of screw drivers
- Hand saw
- Tape measure
- Pencil
- Set of spirit levels
- Masking tape
- Hammer
- clamps
Power tools
- Cordless drill and impact driver
- SDS drill
- Jig saw (downward cutting jigsaw blades)
- Circular saw
- Router + worktop jig
- Laser level (optional)
Installing base units
When installing base units, the first thing you need to do, is make sure they are all in the correct position, and level all the way around. This is usually achieved by attaching the legs and winding them up or down, till they are in the correct position.
Legs will sometimes be pushed into pre-drilled holes and hammered in. However, on some kitchens you may need to screw them in place. This can be done with a cordless drill or your manual screwdrivers.
To level the units you have two choices:
- Use your spirit levels.
- Use a laser level.
The latter does make things far easier, as it will help you to level your units on all edges. However, even with a laser level, you should still manually check your units with a spirit level.
You can see a good, affordable laser level for fitting kitchens by clicking here.
Once your base units are level and positioned correctly, you can fix them in place. The tools you use will vary slightly, based on the surface you are fixing too. However, assuming you are fixing to a solid wall, you will need to drill holes with your SDS and then fix in place with your impact driver.
If you don’t already have an SDS and this is a DIY installation, I would recommend a 240v corded SDS, as this will be more affordable. You can see a good example by clicking here.
Also, a good quality cordless drill and impact driver can be picked up at a reasonable price. I personally own an 18v DeWalt set that you can see by clicking here.
Installing wall units
Once your base units are all fitted in place, you can move on to the wall units. The height will need measuring with your tape measure and marking with a pencil, along with the location of your fixings. In most cases, wall units will be hung with kitchen cabinet hanging brackets.
These are fitted inside the cupboard and a rail is fixed to the wall. Fixings used here will be the same as your base cabinets, so the same tools will be required.
Just like your base units, you should make sure that your wall units are fitted plumb and level. The hanging brackets will usually have a screw that can be adjusted. This will enable you to move the unit up and down, to achieve the perfect level. This can be done with your manual screwdrivers.
Again, this can all be checked for level with your spirit levels.
Cutting worktop joints
Fitting your worktops will depend on the material they are made from.
For stone worktops such as granite, you should always hire a professional to install them. On the other hand, if you are installing a standard laminate worktop, you will usually be doing this in one of two ways.
- Creating a butt joint with a router
- Using a jointing strip
The latter is much simpler and will only require you to screw your jointing strip to the end of the worktop. However, this is a cheaper look. If you want a high-quality finish, then using a router to create your joint is a better idea.
To do this, you will need a router and a worktop jig, in order to cut both sides of the joint, as well as cutting holes for the connecting bolts underneath the worktop.
You can see a decent DIY router by clicking here.
You will also need a kitchen worktop jig and some straight cutter bits to complete this job.
Shortening, cutting, and fixing worktops
If you need to shorten your worktop, the best tool for this job is a circular saw. You will need to mark where the worktop needs cutting and then cover with masking tape. Next flip the worktop over and cut from the bottom. This combined with the tape, will stop your laminate chipping.
Use a straight edge (spirit level) to create a guide and clamp it in place. This will ensure a perfect straight cut. You can read about a good budget circular saw I bought recently by clicking here.
The other cuts you will make, are for things like sinks and hobs. These will be cut using a jigsaw with a downward cutting blade. Again, you should use masking tape to protect the worktop from chipping.
Finally, you will need to fit your worktops to the base units. This is relatively simple; it will require you to pre-drill holes with your cordless drill and screw the worktop from underneath.
Fitting doors, drawers, and handles
This section is relatively simple and all you will need is a manual screwdriver. When fitting your doors, the hinge plates are attached inside the units. These will usually have pre-drilled holes and push into place. Following this, they can be screwed through the provided screw holes.
The hinges attached to the doors in a similar way. Once the hinges and hinge plates are attached, you can slot them together to hang the door. Following this, the hinges can be adjusted in various ways, to align them correctly. This can all be done with a manual screwdriver.
Your drawers may need assembling. However, this is usually very simple and again a screwdriver is all you need.
Finally you can attach the handles, by screwing them to the doors and drawers.
Conclusion
This is a rough guide of the tools needed for kitchen fitting. Obviously, every job is slightly different, so you may use slightly different tools in certain circumstances. However, the tools provided here, give a rough guide of what you will need to instal the vast majority of kitchens.
Just remember, this is a skilled job. In order for you to do it well, you will need to ensure that everything is done correctly. If in doubt, you should speak with a professional carpenter or kitchen fitter.