Watch the complete video below, covering the entire wall construction process. You can also read a detailed written guide below the video.
To watch the full roof construction video next click here
In this article, we will be looking at garden room wall construction. This will cover the entire process including:
- Marking out your timber
- Cutting to length
- Fixing the frames together
- Attaching your wall to the base
- Allowing for any door and window openings
- And making sure the entire structure is plumb and square
Essentially, garden room walls, are just stud walls, and whilst this may seem like a daunting task, it is actually relatively simple. Providing you take your time, anyone who is a competent DIY’er could do this job.
Setting out and marking your timber
In these instructions, I will be referencing the video above. However, the process will be the same for any garden room. To get started, I would recommend building the biggest wall first. In this example that was the back wall.
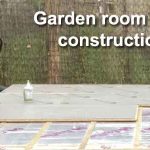
First cut two pieces of timber for the top and bottom of the stud wall.. These should be the entire length of the base, minus 22mm either side for the OSB sheeting. This will be added to the face of the wall after it is built.
The goal here is for your wall to finish flush with the edge of your base/floor.
Next you need to mark out where the studs will go. To do this, lay the timbers together so their ends are flush and space the stud marks at 400mm intervals.
The goal here is to create a wall that has evenly spaced uprights. Not only will this create a strong and sturdy wall, but it will also provide a fixing for your OSB and your internal plasterboard.
You should mark your timbers from left to right. Start by drawing an X for the first stud at the end. Next measure 380mm and mark with a |X.
The line is the edge of your stud, and the cross is where it will land. Following the first measurement, every one thereafter will be 400mm.
If this is measured correctly, your third mark should measure 1200mm to the centre of the stud (20mm past the line).
All marks should be transferred across both timbers, so they are identical. Make sure they are exactly the same length, and the ends are flush before you start marking.
Back wall construction
Building the back wall for your garden room is usually the easiest to build. In most cases, this will be a straight wall with no slope. Therefore, each stud will be identical in length. Simply cut all the studs to the desired length, then proceed to lay them between your top and bottom rail, lining up with your marks from the last step.
Once you have the studs in position, add two fixings to either end. Ideally, this will be done with a first fix nail gun. However, if you don’t have a nail gun, you can hammer 4inch nails manually with a hammer. Or you can use screws.
A nail gun is a much faster option, and it is also a tool that will get a lot of use during the entire garden room build. If you are building the room as a DIY project, it might be a good idea to purchase a nail gun. The time it saves will more than pay for the cost of the gun.
You can see the nail gun I used for my garden room project, and read lots of reviews by clicking here
Securing the wall in place
Ideally, you will be carrying out your garden room wall construction with some help. However, it is possible on your own, you will just need to make sure you prop the wall. This will stop it falling before the side walls are added to provide extra stability.
Once your wall is stood in place, you can fix through the bottom into the base. In the video example, we are fixing into a timber floor, so this is quite simple. You can use a nail gun to add initial fixings. However, the wall should be screwed in place using screws. This will result in a much stronger fixing and avoid any risk of movement.
At this point, props should also be applied to ensure the wall is plumb
Side walls Construction
The side walls of your garden room will usually be sloped. This is to create fall from front to back, which will allow water to run down the flat roof into a gutter.
Due to this slope, the construction will be slightly different to the back wall, as each stud will be a different size.
To work out the length of the studs, divide this slope (for example 100mm) by the number of studs. This will give you the measurement that each stud decreases by. You should also add a slightly angled cut to the tops. You can see how I did this in the video above.
Once all the timbers are cut, these walls are built in the same way as the back wall. Again you will need to add props to ensure the wall is completely plumb.
Creating the Front Wall
This part of the garden rooms wall construction is slightly different again. The front wall will usually have an opening for your main door into the garden room.
This means the wall is made in two parts, one either side of your door opening (cheeks). This wall also has a step to fit a lintel in place. The lintel will form a strong support above your door for the garden rooms roof.
The process of marking, cutting, and fixing is similar to both the back and side walls. However, it is slightly different. For this part, I do recommend you watch the video above for more details on the exact process.
Once the two smaller walls are in place and fixed to the side walls, you can use a string line or a laser to make sure they are running in line with each other. Once the bottom of each wall are running in a straight line, across the front of the garden room base, they can be fixed in place.
Again, you will need to check for plumb and make sure your walls are propped in the exact right position.
Once the frame is ready, you can add the lintel in place. This is typically made of two pieces of timber, bolted together. Although, you could opt for a steel lintel if you prefer.
The timber lintel I used consisted of 2 lengths of 5×2 bolted together. To do this, drill holes and fasten them together using coach bolts. This will ensure you securely fix the timber pieces together, forming a much stronger lintel.
Add OSB to your garden room walls
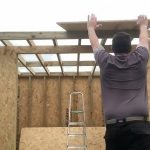
Once your wall is fixed in place, you can start to add the outer OSB sheets. These can be nailed or screwed in place (I opted for the nail gun again).
One advantage of adding the OSB, is the edges are machined square. This means they will help you to keep the structure square and plumb as it is added. It will also add a massive amount of strength and rigidity, forming the basic structure of your room.
Simply cover the entire outside with the OSB and your garden room walls are complete.
Conclusion
This is the entire process required for garden room wall construction! Remember, this process might seem daunting, but with the right tools and a bit of patience, it can be achieved, even as a DIY project.
The main things to remember are:
- Accurate measurements
- Fixing securely
- Always ensure that you are checking plumb, square, and level
- Also, good garden room floor construction is important
With regards to the last point, the base and floor are extremely important. If your base is already square and level, it will make the wall building process 10X easier.
To learn more about creating the best foundations for your walls click the links below: