Tapered edge plasterboards can be a very convenient time saver. As the name suggests, they have a tapered edge. This means they have their joints filled, as opposed to skimming the entire board with plaster. This process is often referred to as dry lining.
The way to finish this type of plasterboard, is by filling and taping the joints, followed by sanding, and then painting straight on to the boards.
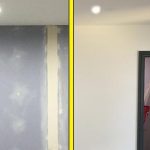
Using tapered edge boards on walls is very common practice. The taping and filling of joints, can be done by a less experienced person, without the need for much plastering skills. Boards are 2400mm in length, so they can be stood upright against walls, with the joint running floor to ceiling.
Due to standard ceiling height being roughly 2.4m, this means there is very little cutting of the boards required.
As you can see, less cutting, and no plastering combined, can save a large amount of time. So whilst a tapered edge board is slightly more expensive than a straight edged board. The difference is easily made up, by the time you save installing. As well as the additional time and money you will save, by not skimming the surface.
Therefore, tapered edge plasterboards can be very convenient on walls. But can you use tapered edge plasterboards on a ceiling.
Tapered edge boards can be used on a ceiling. However, it’s important to remember, they are only tapered on their long sides, whereas the top and bottom of the board have straight edges.
Due to straight edges, there is no tapered joint when boards are fixed end to end. Instead you will have a butt joint. This is more complicated to fill compared with a tapered joint.
As a result, you may prefer to use standard boards and skim when installing plasterboard to a ceiling.
Unless you are experienced at filling butt joints, there is a danger of doing a 2nd rate job and having noticeable joints.
How to install tapered edge board on a ceiling
If you do have a narrow ceiling, where 2400mm long plasterboards can be installed with no butt joints, then using tapered edge board on your ceiling is a great option.
In this scenario you would simply need to fill the tapered joints. This is relatively simple; you will just need to fill the board joint and apply jointing tape. This can be smoothed flat with a jointing knife or plastering trowel.
Once dry, you should check for any raised areas of dry joint filler and scrape away. Following this, you are ready to apply your coat of finishing compound.
Apply a coat over the top filling just slightly over flush with the tapered joint. Again, let this dry, then it can be sanded for a flat smooth finished joint.
How to deal with filling butt joints
If you do decide to install tapered edge boards on a ceiling, and you do have butt joints, you can still fill these with drylining compound. However, the process is slightly different.
For these joints, you will need to taper the edges much further. This will help to create the illusion of a completely flat surface.
If you fail to do this correctly, the joint will cast a shadow when light hits it. This will make the joints really obvious and result in a poor finish.
To get started you need to first tape the joint. To do this apply a 50mm band of joint filler to the butt joint. This should be around 2mm thick. Next, cut your tape to length and place it on the filler, then smooth with a jointing knife, applying pressure. This will push out a lot of the compound. Simply take this on your knife and reapply over the tape.
The goal here, is to try and achieve a flat tape, that is stuck in place securely, with no bubbles or creases. Also, the finished layer of tape and filler shouldn’t be too thick. The thicker it is, the more you will need to taper it out, and the more chance of a noticeable joint.
Once this is done, you should add an additional thin layer of filler 100mm either side from the jointing tape section. Again, this should be thin, and is the beginning of tapering this joint.
Once this is dry, and you have cleaned the surface for any raised spots of filler, you can start to apply the finishing compound. Currently, you should have around 200mm of filler on the joint. You will want to extend this out an additional 50-100mm either side, in order to further taper this joint.
Once this is dry, it is ready to sand and finish.
For a full run through of the process, you can watch a detailed video from British Gypsum below:
Tapered edge boards on a ceiling vs Skimming
Personally, I would have to say that a skimmed plaster ceiling is the better-quality option of the two. With that said, it doesn’t mean you can’t do a good job with drylining. However, in reality the latter is not likely to save that much time.
The process of boarding the ceiling will be similar, so this will take the same amount of time. Also due to other factors, such as:
- Multiple layers of jointing and finishing compound
- Drying times between coats
- Sanding
- And a level of skill to fill butt joints
The process of drylining is no quicker than boarding and skimming. In fact, a good spread (plasterer) would skim the ceiling in a day, so in reality its probably quicker to skim.
However, if you are doing the wok yourself, you can use tapered edged plasterboard on a ceiling as an alternative. It might save you some money if you don’t want to hire a plasterer to do the work.
Certainly if the job is done properly, it can provide a good quality finish.