Certain rooms around the home require specific materials when it comes to replacing or restoring the existing walls. Kitchens and bathrooms are known to be wet and humid, so they benefit from surfaces that can handle the extra moisture. One popular material is aquapanel.
This is particularly true if you plan to tile, this is a job where aquapanel is a good option. It is 100% waterproof and is resistant to mould and mildew, plus it is already keyed for tiling. However, when fitting aqua panels, is it possible to dot and dab? Or do you need to use another method when fitting them?
If you are looking to install aqua panels then you need to make sure you install them correctly. How you fit them will depend on the surface you are fitting them to. If you are looking to install them securely then you can opt to use dot and dab.
However, dot and dab is not enough to hold the boards in place on its own. As a result, you will also need to secure them in place using mechanical fixings as well. This will ensure that they remain firmly in place, and you can achieve an even finish.
How Do You Dot and Dab AquaPanel?
Aqua panel boards are exceptionally heavy, as they are a cement board that is reinforced with glass fibre. They are designed for use in areas that have high levels of moisture. Because of this, you need to make sure they are fitted correctly.
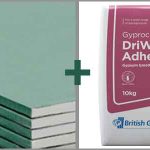
Dot and dab is not recommended by the manufacturer, but it can be used. If you choose this option, you will need to make sure that you carry out further work to secure them in place.
To begin, you will need to make sure that the surface is solid and secure. Any loose brickwork, plaster, or paint will need to be fixed. This will help to create a clean and secure surface for the adhesive to grip to.
Depending on the surface, some will absorb a lot of moisture, such as masonry walls. This means that they can suck the moisture out of the adhesive. To prevent this, you can prepare the wall using a coat of PVA mixed with water. This will help to create a stronger bond and will enable the adhesive to dry correctly.
While dot and dab is not recommended, it can be used to hold the boards in place, before using a mechanical fixing to fully secure the boards. Along with this, you can also use the dot and dab to create an even finish.
To create a solid fixing, you should look to apply adhesive around the perimeter of the wall. You can then apply the dabs of adhesive at 8 inch gaps. Finally, you can put the boards in place and allow the adhesive to set.
Once the adhesive has hardened, you can then add the mechanical through fixings. These need to be fitted through the dabs of adhesive and into the wall behind. It is important to fit them through the dabs, as this will help to keep the board in place.
You should always make sure you fix through a dab of adhesive, otherwise it will cause the boards to flex and distort, which means that they won’t be smooth or flat.
What is The Best Way to Fit Aqua Board?
While it is possible to fit aqua panels using dot and dab, it is rarely the best option. Therefore, depending on the surface, you can opt to use a different fixing method. So, what options are available to you based on the surface you are fixing to?
Brick Wall
If you are fitting aqua panels onto a brick wall, then you have two options available. You can choose to dot and dab, which will also require additional, mechanical fixings to secure the boards in place.
Alternatively, you can opt to use battens, enabling you to fit the aqua panels directly to the timber. If the brick wall is level and flat, then you won’t have a problem achieving a perfect finish. If the walls are not level, then you are going to need to carry out prep work to ensure that the battens are level. This will involve packing the batten to achieve a flat plumb surface.
To fit the boards, your battens should be fixed vertically at 400mm centres. Once the battens are in place, you can then screw the aqua panels to the battens at the recommended distances
Stud Wall
If you have a stud wall, then you don’t need to consider dot and dab. A stud wall will provide the ideal base and structure for fitting aqua panels. Basically, you can screw the boards directly onto the studwork.
The stud wall will allow you to put the boards in place and secure them by screwing directly into the timber frame. Just like battens, the studs are likely to be 400mm centres.
Fitting Over Plasterboard
It is possible to fit aqua panels over plasterboard. However, you will need to make sure that the wall is sound and even. Furthermore, you will also need to make sure that the existing walls are firmly fixed in place.
If the original plasterboards are secured to a stud wall, you can screw right through the aqua panels and plasterboard into the timber frame.
However, the plasterboards might already be secured to a solid wall using dot and dab. If this is the case, you will need to fix the boards to the wall behind. To achieve this, you will need to locate the dabs of adhesive. Once they have been found, you can then drill through them and into the surface beneath. This will help to create a secure fixing but will also prevent the boards from warping when the screws are tightened.
If the plasterboards are fixed to battens, you will need to check that the battens are secure. If they are, you can fit the aqua panels by screwing through the plasterboard and into the battens.
There are several different options available, but it’s important to remember that the best option will depend on the existing surface and its condition.
Conclusion
It is possible to dot and dab aquapanels, but this alone is not enough to secure the panels in place. As they are heavy, you will need to make sure that you use mechanical fixings to fit them securely.
Fortunately, there are several other options available to fit aqua panels. This will depend on the type of wall and surface. The important thing to remember is that they are securely fixed in place.