Stud walls are typically non load bearing partitions within a property. There main purpose is to divide rooms from one another. Installing stud walls is quicker and more affordable compared with solid walls.
They also offer several other advantages, such as:
- A convenient space for insulation
- Services can easily be ran through the wall
- Easy to board and plaster
- Convenient for fixing skirting, architrave, etc.
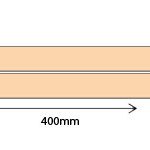
As a general rule, stud walls are built using 75mm x 50mm (3x2inch) timbers. The smallest planed size would usually be CLS, which has a thickness of 63mm.
Add to this, the thinnest plasterboard at 9.5mm and you would have a wall that is 82mm. This assumes that both sides are boarded. If only one side was boarded, this would be 72.5mm.
Building regulations don’t have an absolute minimum thickness for stud walls. However, there are several things you should take into consideration:
- How your wall is fixed
- The thickness of plasterboard
- Wall height from floor to ceiling.
- And the overall size of the wall
To give an example, let’s assume your ceilings are quite high at 3m. If you built a wall using CLS, at 38mm x 63mm, then combine this with a thin 9.5mm plasterboard. This would not be adequate, and the result would be a very flimsy wall, with a lot of movement.
A more appropriate wall in this situation, would use thicker studs, such as 100mm x 50mm (4x2inch). You could also fit a 12.5mm plasterboard. The result would be a much sturdier wall that is fit for purpose.
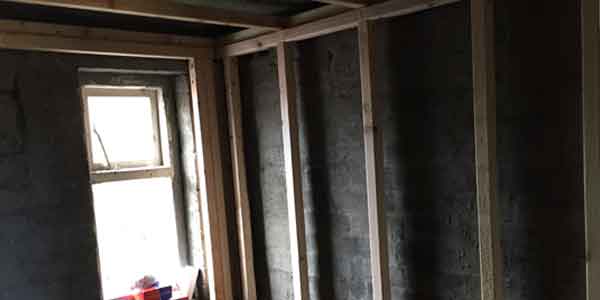
Real life example where I built a thin stud wall
The opposite can also be true.
This is an example where I made a thinner stud wall on a personal project.
The timber I used was 50mm x 50mm sawn ungraded timber. The job I used it for, was the internal walls of a brick shed, which I converted into an office.
The space was originally an outdoor toilet and a bin store/coal shed. Once I removed a dividing wall and stripped everything else out, I was left with a small space, measuring roughly 2.5m x 2m. It also had a low ceiling height of just over 2m.
Because this was a small space, I wanted to preserve as much of it as possible. At the same time I wanted to add internal insulation, to make the office comfortable year-round.
At this point I had a couple of options:
- Build internal stud walls and fill with insulation
- Install insulated plasterboards
The latter was more expensive and would require either dot and dab or timber lats on the walls. Personally, this seemed like more money and more work, so I decided on the studwork.
However, I wanted to reduce costs and I wanted to maximise space. Because the ceiling was low. I decided I could save money by using sawn 2×2.
This was considerably cheaper than CLS. However the quality was much lower. Therefore I went to the timber merchants and manually selected each piece of timber by hand. This ensured I had the straightest, best quality lengths available.
Had these been delivered, I am confident the quality would have been shocking.
I finished the walls with 12.5mm plasterboards and the finished walls are solid. They literally have zero flex when you push them.
So as you can see context is very important.
Stud wall size considerations
Above I gave a hypothetical example, with high ceilings. I also gave a real-life example, with a personal project, where ceilings were low, and the walls were small.
Bearing these examples in mind, I think there are several considerations when you decide how thin a stud wall can be. These include:
- Ceiling height – In general, the higher the ceiling, the thicker timber you will require. If you use thin timber on a high ceiling, the structure will be very weak and will suffer from large amounts of movement. For standard ceiling height, a relatively thin CLS will be more than adequate.
- The size and span of the wall – A small wall covering 2 meters or less, will be far less prone to movement. This could mean you can use even thinner timber than a planed CLS. Alternatively, a long wall spanning an entire room or a hallway, would generally require more standard sized timbers. If ceilings were also high, you might want to go thicker.
- Plasterboard thickness – The plasterboard you opt for, will affect the rigidity of the stud wall. Standard sizes are generally 9.5mm, 12.5mm and 15mm.
- What services need to run in the wall – If you are running pipes wires and any other important services, this could affect the thickness of your wall.
Conclusion
In the vast majority of cases, a sawn or planed 3×2 timber will be your best option for a thin stud wall. Generally, the thinnest timber in these dimensions, would be a planed product, such as CLS.
3×2 CLS has finished dimensions of 38mm x 63mm. Once boarded, this creates a relatively thin stud wall.
As I demonstrated above. There are certain cases where you could go thinner. However, this swill only be suitable over smaller surfaces. If the span and height is too much, the wall will not be very sturdy using thinner timbers.
Also, where thinner timber is used, you can strengthen with thicker plasterboard. Even the 3mm difference between a 9.5mm board and a 12.5mm board, has a significant difference in the strength it will provide to the wall.