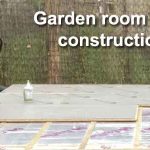
When building a garden room the base construction is your first job and it is also one of the most important parts to get right. Your base should provide a solid level foundation for the building. Everything you build on top of it, will be affected by the quality and accuracy of this part of your build.
To see our next video for building a garden room floor click here
In this article, I will walk you through the process I used to create a concrete base for a DIY garden room. This will take you step by step through the process, making it very easy to follow along and create your own base.
I will also cover the reasons I chose a concrete slab, rather than one of the alternative options that are available, such as ground screws or pads.
You can also see the entire process in the video below:
Why I chose a concrete garden room base construction
A concrete base is not the only way to support a garden room. However, after a lot of consideration it was the method I decided to choose. The reason for this was threefold:
- Quick and relatively easy
- Extremely strong, stable, and long lasting
- And low cost – Pouring a 4m x 2.7m 100mm deep base cost me £338.20
Materials used in this job are:
- 1 jumbo bag of MOT type 1 hardcore
- 2 jumbo bags of ballast
- 10 25kg bags of cement
- Timber – two lengths at 4.2 meters and two at 3 meters
The entire process was completed in just one and a half days, and this is despite the fact that I mixed the concrete myself in a cement mixer.
Once completed, the base was completely level, perfectly square and solid. The base being square, and level is extremely important for the rest of the build. These two factors will affect everything that is built off this foundation.
The reason I wanted a strong solid base, was the garden rooms use. For my garden room I was creating a personal gym, so I wanted a completely solid floor.
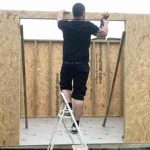
The process of building a garden room
As I already mentioned, getting this correct will make the rest of your build much easier, and the vast majority of making this a success is in the preparation. Below you can see the steps I carried out from start to finish.
Clearing the area and digging out for the base
The first job is to clear the area where you intend to add the base. For me this was my garden and it meant removing several plants and bushes. I made sure these were fully removed and all the roots were fully dug out too.
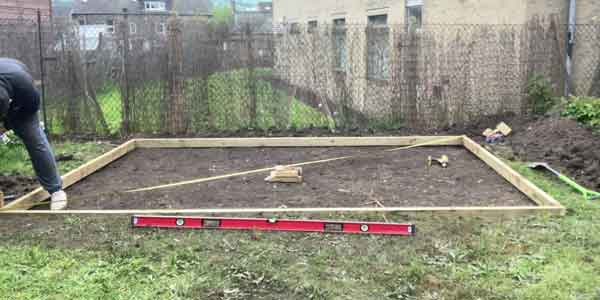
Following this I marked out an area the shape of the base, plus additional room for the timber formwork. I tried to make sure this was as square as possible, with plenty of space to adjust. This would ensure I was able to create a completely square base.
Once I was happy with the area that had been marked out, I removed the grass and topsoil to a depth of around 50mm. Next I raked the area and used a rammer tool to compress and level the soil.
I checked the level with a spirit level, (it doesn’t need to be 100% at this point). This process can be seen in the video above and it was relatively easy as my garden wasn’t too far out of level to start with.
Obviously. If the area your base is being installed is on more of a slope, this may be more of a challenge.
Building the formwork (shuttering)
The formwork is a temporary structure that is built to pour concrete into. Its purpose is to form a solid frame that holds the concrete in a specific shape, whilst it cures and goes hard. This can be a complicated and skilled process for larger structures. However, the formwork used to create this type of base is actually very simple.
The basic structure is 4 pieces of wood, cut to length and fixed together to form a rectangular frame. The base I created was 100mm deep, so I used 100x47mm lengths of timber (4×2 inch). These were screwed together in each corner with a couple of 4-inch screws.
Once the frame was fixed together, I used a tape measure to take measurements from corner to corner, diagonally across the frame. I then repeated this on the opposite diagonal to get the frame square. The goal here is to make sure each diagonal is exactly the same distance. Once this is achieved, the formwork should be square.
When you are happy it is in the correct alignment, timber stakes can be used to hold the position of your formwork.
At this point, you should have a completely square structure that is fully supported, meaning it cannot move out of this position.
Next you need to make the top of the frame level. This can be done manually with a spirit level. Alternatively, you can use a laser level if you have access to one.
Once you are completely happy that the timber frame is level and square, you can fix the frame in place by screwing it to the support posts. Make sure this is screwed from the outside. If done from the inside, you won’t be able to access the screws once the concrete is poured.
Creating a solid foundation for your concrete Base
Before pouring any concrete, you need to create a strong foundation for your base to be poured onto. The way to do this, is by laying hardcore, this is a material that creates a solid layer of interlocking stones in a variety of sizes. Once compressed they form a very solid surface that helps to support the concrete slab.
My base was approximately 4m x 2.7m. I used 1 tonne bag of MOT type 1 hardcore to create this initial foundation layer. This was compressed to the bottom of my timber formwork to form a solid level surface to pour 100mm of concrete onto.
Mixing and pouring my garden room base
The final job after all this preparation is to pour the concrete slab. You can have this brought in premixed by a company, or like me just mix it yourself. The latter is going to be cheaper, but it is extra work.
For the concrete I used a 5:1 mix. This consisted of five parts ballast and one part cement. These were simply mixed in a standard electric cement mixer, and water was added to reach the desired consistency. Once mixed, a wheelbarrow was used to move it from the mixer to where it was being poured.
As the concrete was being poured, a long piece of timber was used to level the surface and a float to even and smooth areas of the concrete out.
This process is not particularly complicated, and providing your timber formwork is secured level, you shouldn’t have any issue achieving a nice flat and level base.
Once poured you should leave it to dry overnight, and it should be ready to walk on within a couple of days. Finally remember to cover the concrete if there is a chance of rain.
Conclusion
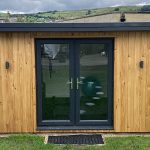
So there you have it, this is the entire process of constructing a concrete garden room base. There are definitely other ways this can be done. However, if you are looking for an effective, affordable, and relatively easy way to build a solid base, then this is definitely the method I would recommend.
Click here for the full tools and materials list for this project