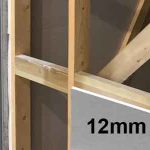
You can definitely use 12.5mm plasterboard on a ceiling. In fact it’s the most common thickness for ceilings in residential properties.
Some people like to use 9.5mm plasterboards on ceilings. This is mainly because they are lighter to work with, and they are also cheaper than 12.5mm boards.

However, this does present several problems. Firstly, 9.5mm boards have much more flex, this means the potential for movement is higher. This is not great for plaster, so you will need sufficient fixings and noggins to avoid boards moving and cracking the plaster
Also, 9.5mm plasterboards are less fire resistant. If there is another habitable floor above the ceiling, then they do not meet building regulations. This states that 30 minutes of fire resistance is required, in floors, walls, and structural beams.
The main advantages with a 12.5mm plasterboard can be seen below:
- They have a 30-minute fire rating. This means they meet the requirements stipulated by building regulations.
- They are stronger when fitted and far less likely to move and sag. This means cracks in the ceiling plaster are far less likely.
- Whilst slightly heavier, 12.5mm boards really aren’t much harder to install than 9.5mm boards. Also, thinner boards are more prone to snapping during installation, especially when they are full size (1200mm x 2400mm).
In most cases, fitting plasterboards to a ceiling is a two-man job, so any extra effort is minimal.
Preparing to fit your 12.5mm plasterboards to the ceiling
Fitting 12.5mm plasterboards to a ceiling, is relatively easy in terms of skill. However, it is hard work, boards are heavy. To ensure you don’t waste energy you should plan the fitting prior to starting work.
You will need to fix the boards with drywall screws. The length of screw you use should be at least 38mm for this thickness of board.
32mm would be acceptable when fitting 9.5mm boards. Anything lower than this should not be used when screwing boards to any ceilings.
Before you get started, you need to check a couple of things.
Firstly, you need to check your joist spacing. Generally this will be 400mm or 600mm. Sometimes you will find them set at 450, but this is less common.
In particularly old properties, you may even find the joists are less uniform. However, 400mm spacing is the most common you will find.
Once you determine the spacing, you should find the wall that the joists are measured from. Whoever fit the joists, would have started from one of the walls. When doing this, the centre of the first joist would be 400mm from the wall.
This is the wall you should start boarding from. If all the joists were fitted well at 400mm centres, the edge of your board should land on the centre of a joist.
This will mean you need to perform less cuts, so depending on the size of the room, you might be able to fit a good number of full boards.
The final thing you should check for is noggins. Ideally you should fit noggins every 1200mm. This will mean you can fit your boards across the joists and the long edge will be supported by the noggins.
If the spacing of your joists is more than 400mm, you definitely need noggins. Personally I would still add them to 400mm centres. However, joists at 400mm, will give pretty good support to a 12.5mm board, so it is not 100% necessary.
How to fit 12.5mm plasterboards to a ceiling
Once you have determined the joist spacing, the wall you will start from, and added any required noggins, you can start to fit your boards.
Ideally this is a two-man job, and you will need a working platform. This will enable you to comfortably hold the boards on the ceiling. Together, lift the board above your heads and move it into position. One person will need to hold the board securely, whilst the other fixes some screws.
Try to quickly add 4-6 screws in opposite sides of the board. This will take the load of the board, allowing you to relax a little whilst you add the rest of the screws. Screws should be added along the joists every 300mm.
Once you have fit a row of boards spanning the whole room, you should come back in the opposite direction. This will allow you to stagger the board joints. Often you will have an off cut that can be used for your first board. This will give you your staggered joints and it will also save on waste.
Simply carry on in this fashion until the job is done.
Fitting a plasterboard ceiling on your own
This can be done, even with full sized boards. There are props you can use to hold the boards on the ceiling. However, this can still be a challenge on your own. Essentially, you will need to lift the boards to the ceiling on your own. Then you will need to slide a prop under to take the weight.
In my opinion, this is not that easy. Even if you are reasonably strong, this is still very awkward.
A much better option is to use a plasterboard lift. This makes the job really simple. All you do is place the board on the lift and then wind it up to the ceiling.
In fact, this is even easier than two people manually lifting the boards.
A plasterboard lift can be hired from a local tool hire company, it’s not that expensive, and you could potentially do the job on your own.
Conclusion
Not only can you use 12.5 mm plasterboards on a ceiling. But it is actually the most common board used. It is a much better option than a 9.5mm board in the vast majority of cases.
Even with only a 3mm difference, it is far more robust and sturdier than 9.5mm. Also, the thinner boards will not meet fire safety regulations if there is a floor above the ceiling.